Free Local CI/CD for Indie Project with TeamCity and why it matters
Every indie game developer knows the pain of packaging and deploying their game. This post explores how to set up a free local CI/CD pipeline using TeamCity to streamline your project workflow.
Introduction
There’s one thing that’s always taunting me in my indie game production - Just finished a few weeks’ work and everything looks solid during PIE, so I decided to make a package and test it on a real device, and then… cooking failure, packaging crashing, UBT crash, or some other unexpected issues pop up EVERY.SINGLE.TIME. To a point that I was even scared about building for how long it takes and how tedious the debugging can be.
Yes, I know, I know, “you should always test in package!” “You should never trust PIE!”. But hey, the cooking process is a resource hungry beast, it eats all the available resources and easily tooks 30-40 mins if not hours to finish. What does that mean? - A slow downed iteration pipeline, for an indie game, losing iteration speed is equal to suicide.
But these statements aren’t wrong by any means. In an ideal world, we want to have constant building and cooking process, auto testing, etc. Every morning, I could see my green build auto pulled from server, and some night, an e-mail would call me up for build failure. (It’s still way better than I was notified for the error a month later, as tracing back and debugging it across hundreds of CLs is an absolute nightmare) The question is, how can we build such an ideal world, it needs to be budget friendly and efficient enough.
As a developer, we should already been familiar with CI/CD (Continuous Integration/Continuous Deployment), in fact this whole web blog was utilizing github CI/CD and vercel CI/CD, so it’s not a new term. Same thing applies to game development. Having a robust CI/CD pipeline is crucial. It ensures that your code is always in a deployable state, automates testing, and speeds up the development process. In this case we will use TeamCity, a powerful CI/CD tool, which can be set up locally to manage your projects effectively for free.
What is TeamCity?
TeamCity is a continuous integration and deployment server developed by JetBrains. It allows you to automate the build, test, and deployment processes of your software projects. TeamCity supports various programming languages and platforms, including Unreal Engine, making it an excellent choice for game developers. There are a couple terms that you should be familiar with before we start:
- Build Agent: A build agent is a software component that runs on a machine and executes the build process. It can be installed on the same machine as
TeamCityor on a separate one. - Build Configuration: A build configuration defines how a project should be built, including the build steps, triggers, and parameters. It specifies the actions to be performed during the build process.
- Build Trigger: A build trigger is an event that initiates a build process. It can be based on various conditions, such as code changes in a version control system or a scheduled time.
- Build Step: A build step is a single action performed during the build process, such as compiling code, running tests, or packaging the project.
- Build Queue: The build queue is a list of builds waiting to be executed.
TeamCitymanages the queue and executes builds based on their priority and availability of build agents. - Build Log: The build log is a record of the build process, including the output of each build step. It helps you diagnose issues and track the progress of builds.
- Build Artifact: A build artifact is a file or set of files produced by the build process, such as compiled binaries, packaged game files, or documentation. Artifacts can be stored and used for deployment or further testing.
- Build History: The build history is a record of all builds executed in
TeamCity, including their status, duration, and artifacts produced. It allows you to track the progress of your project over time and identify trends or issues. - Build Status: The build status indicates whether a build was successful, failed, or is still in progress.
TeamCityprovides visual indicators for build status, making it easy to monitor the health of your project.
So the logic here is, we will set up a TeamCity server, configure a build agent with our local machine, and configure it to build our Unreal Engine project.
To make this process automated, we will create a build configuration that includes steps for compiling the code, running tests, and packaging the game. We will also set up build triggers to automatically start the build process when changes are detected in our version control system (e.g., P4V).
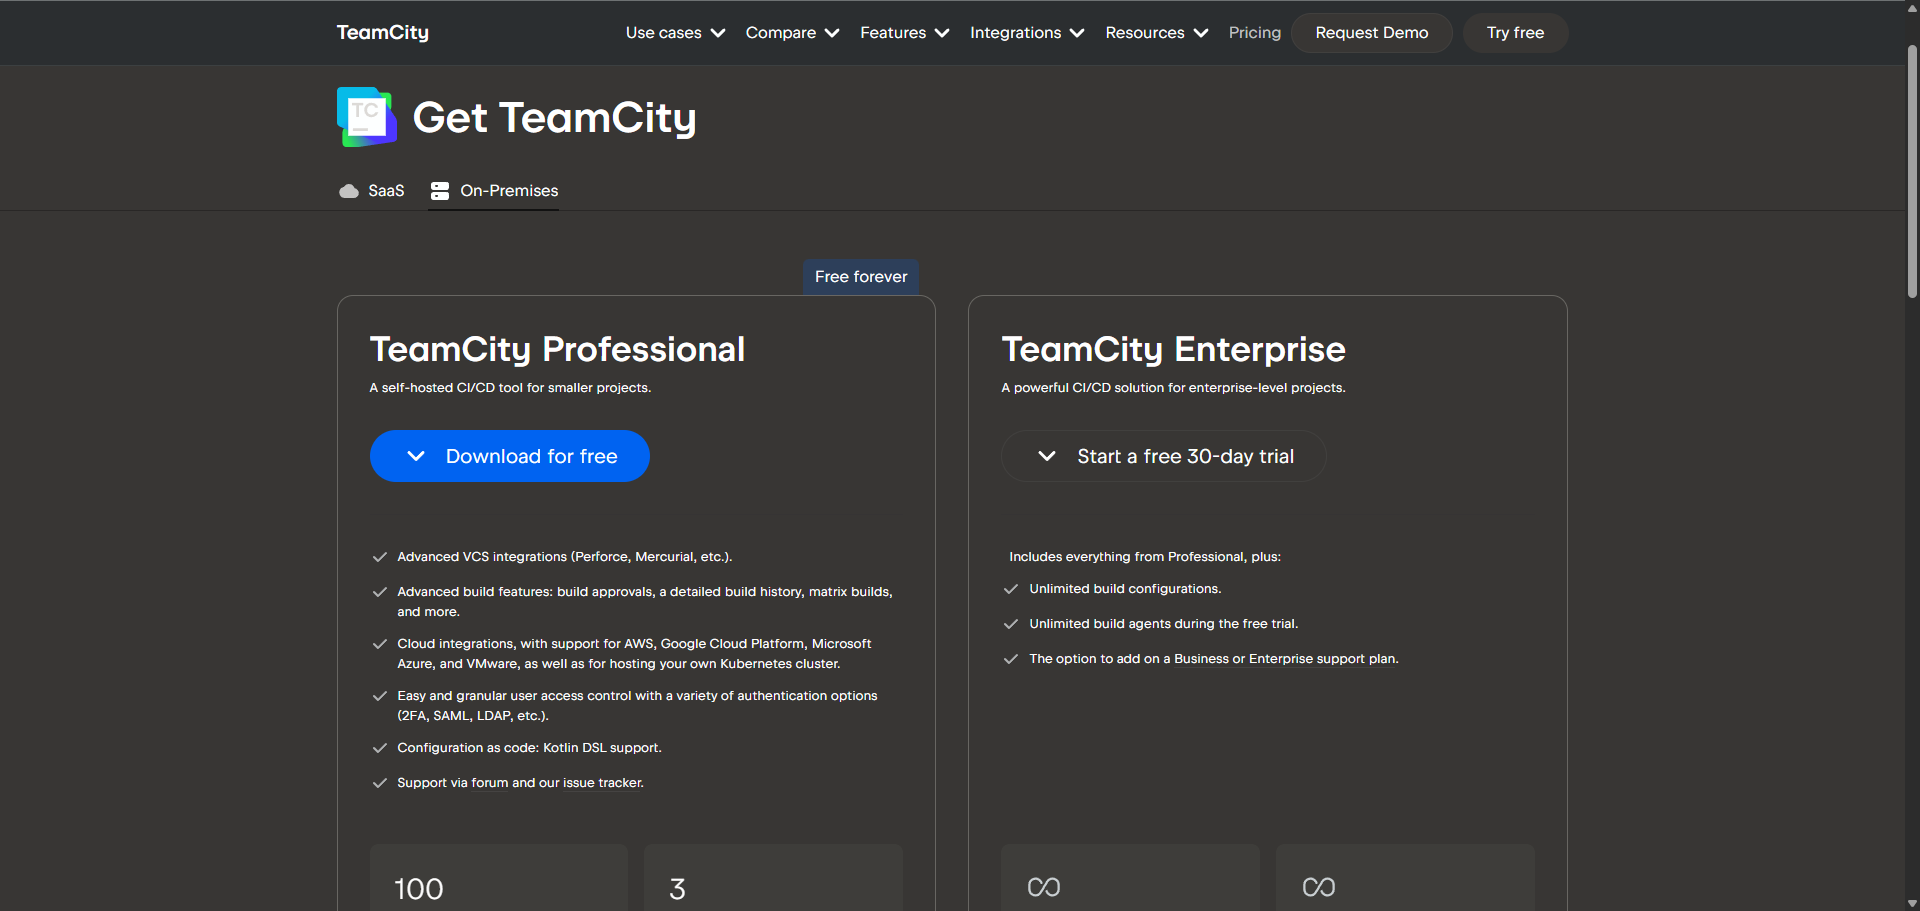
Download TeamCity
Head over to TeamCity’s official website and download the latest version. TeamCity offers paid cloud SasS solution, however, if we just use all our local resources, then they provided a free on-premise license that is perfect for indie developers. The installation process is straightforward, and you can run it on your local machine or a dedicated server.
Configure Build Agent
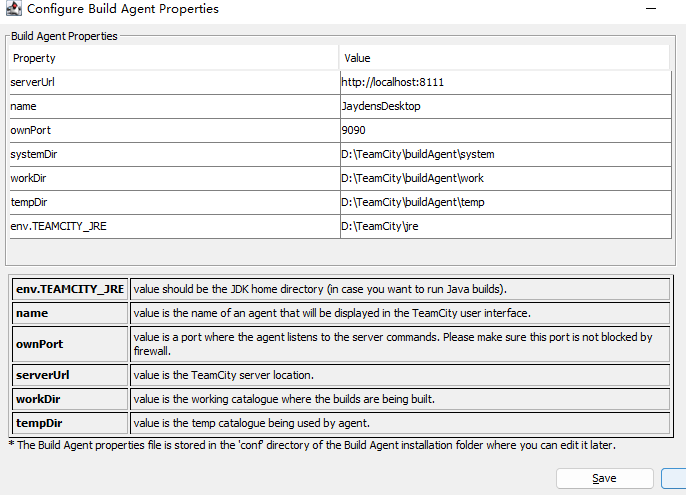
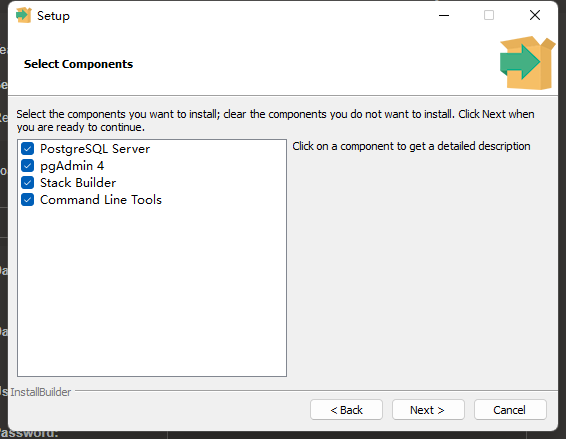
After downloading, run the installer. The installation wizard will guide you through the process. A window would pop up to configure Build Agent. We will just use our local machine as the build agent in this case.
Using my workstation as
build agentis just for the tutorial purpose, in real production, I would host a local NAS for all the data storage & P4, and a standalone build machine that will runTeamCity ServerandBuild Agentwhich will communicate with myNASand do the building process. This way, I can keep my workstation free for development and testing.
Setup PostgreSQL
Next, TeamCity would ask us to set up a database. TeamCity supports various databases, but for this tutorial, we will use PostgreSQL, which is free and works well with TeamCity. Any version higher than 6.0 should be fine, so I am using the latest stable version (17.5).
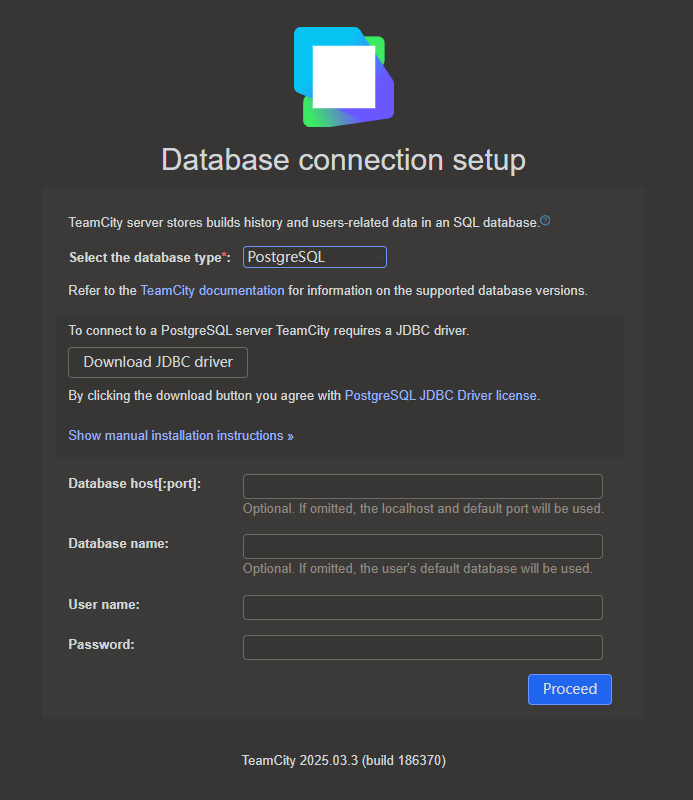
We will install the JDBC Driver first, so just click that
We can then download PostgreSQL from the official website just keep all the default settings, the DB will ask for a password, just remember it as we will need it later.
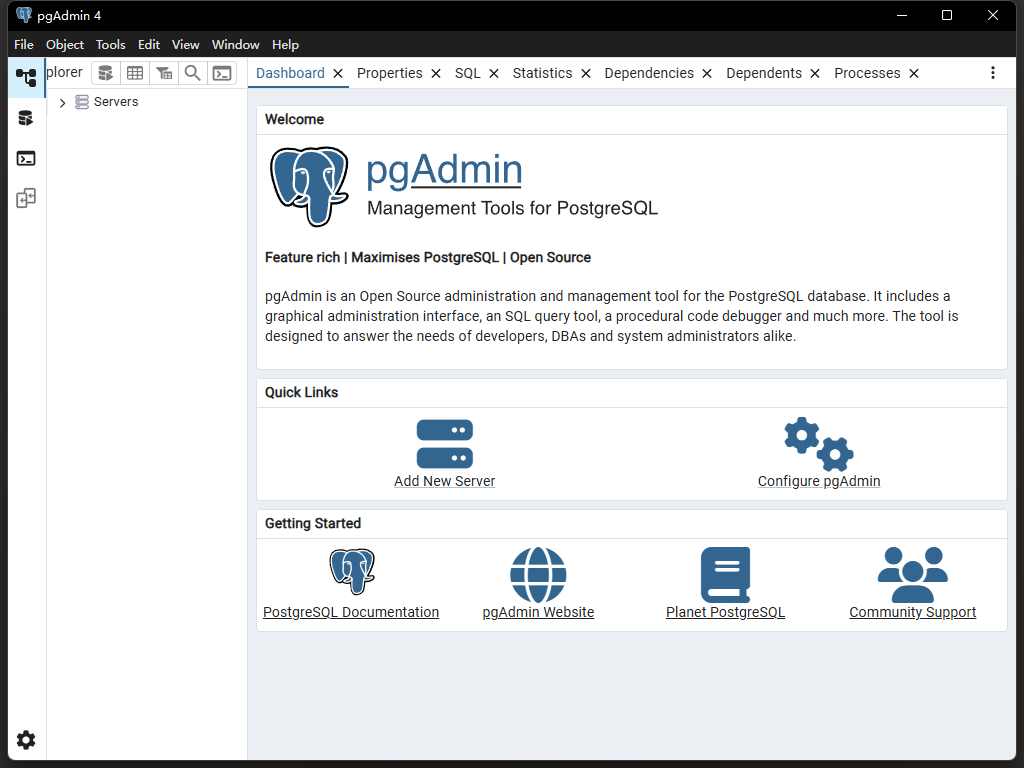
After the installation, you can use pgAdmin to manage your PostgreSQL database.
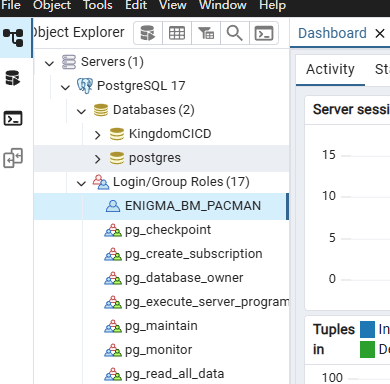
Expanding the Servers category, we will be prompted to enter the password we set earlier. After that, we can create a new database for TeamCity. Right click on Databases and just select Create > Database..., name it with your project and click Save.
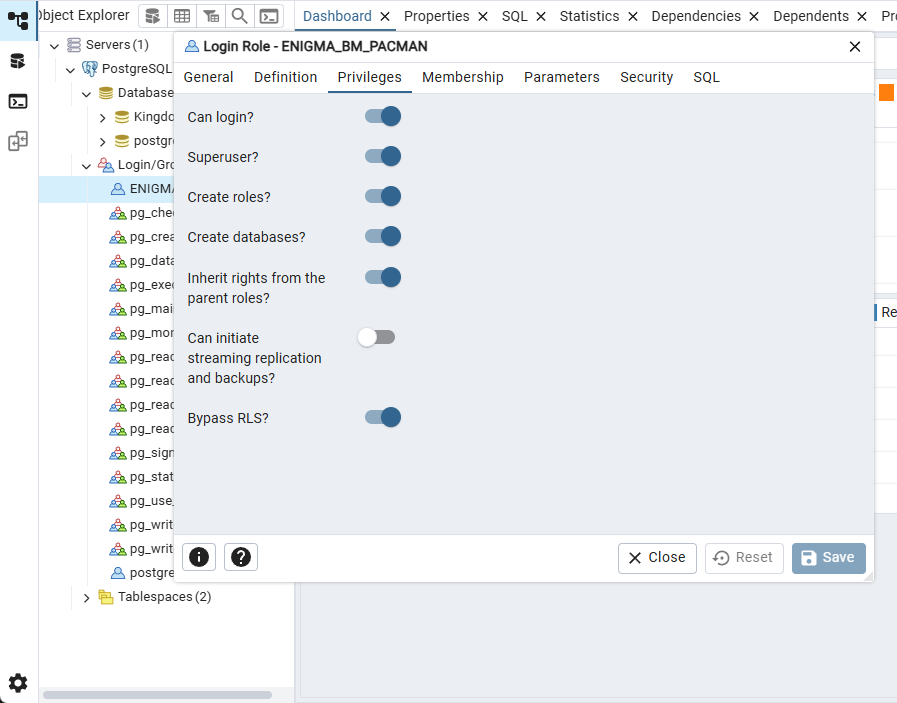
We also need to create a user for TeamCity to access the database. Right click on Login/Group Roles and select Create > Login/Group Role.... Fill in the details, set a password, and make sure to check the Can login? option. (For BM, I was actually making it a super user)
Now go back to the TeamCity installation wizard, and enter the database connection details.
Once confirmed, the wizard will test the connection and if everything is set up correctly, The basic setup is done, and a web interface will be available at http://localhost:8111 by default.
Setup Project
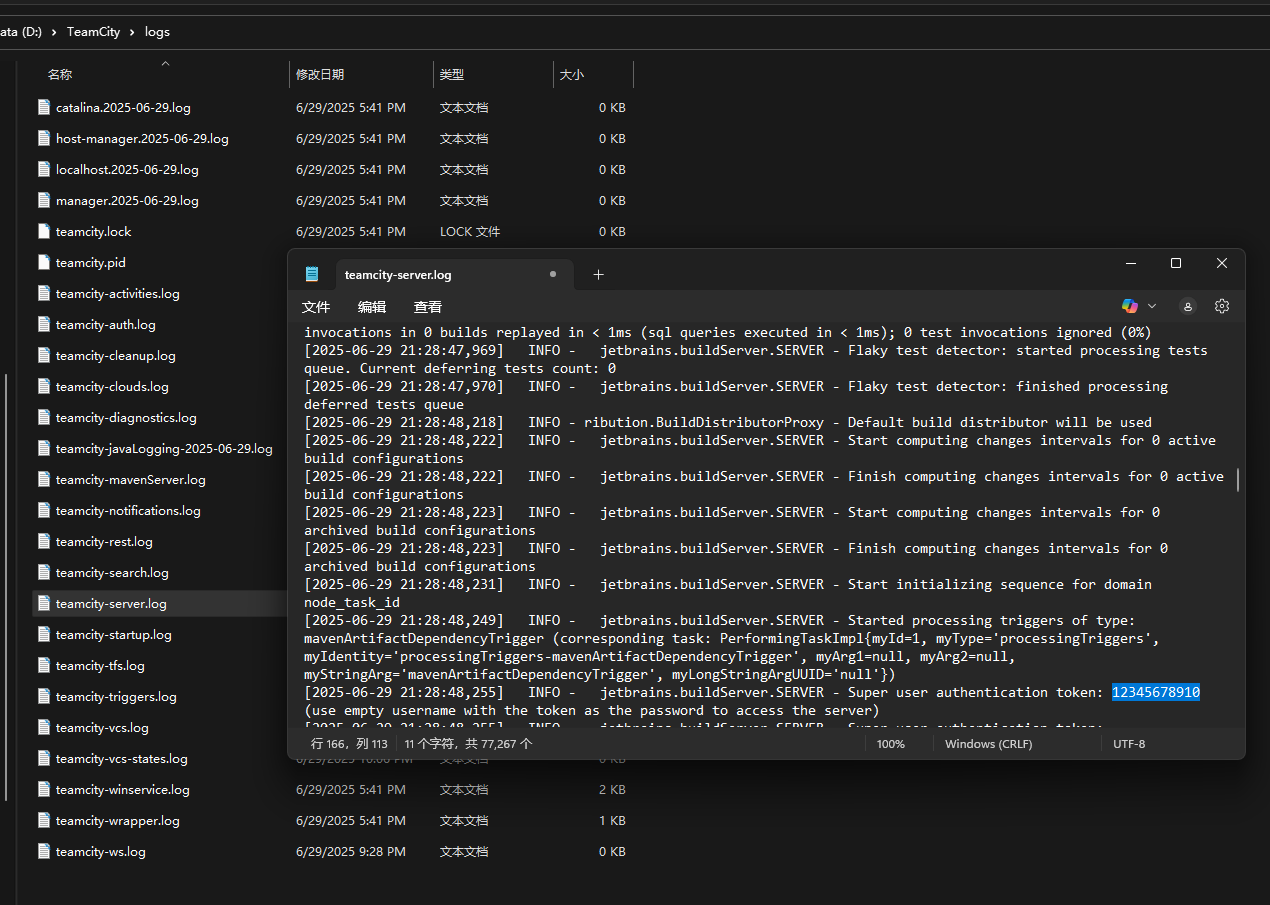
It will ask us to login, however, we want to login as admin, so we just click the login as admin link at the bottom. Once prompted, admin account can only be logged in with a authentication token, which is generated during the installation process. You can find it in the log folder of your TeamCity installation directory, in a file named teamcity-server.log. Open that file and copy the token. We should be able to login now.
The first thing we need to do is to create a new project. Click on the Projects tab and then click on Create Project. Enter a name for your project, and click Create.
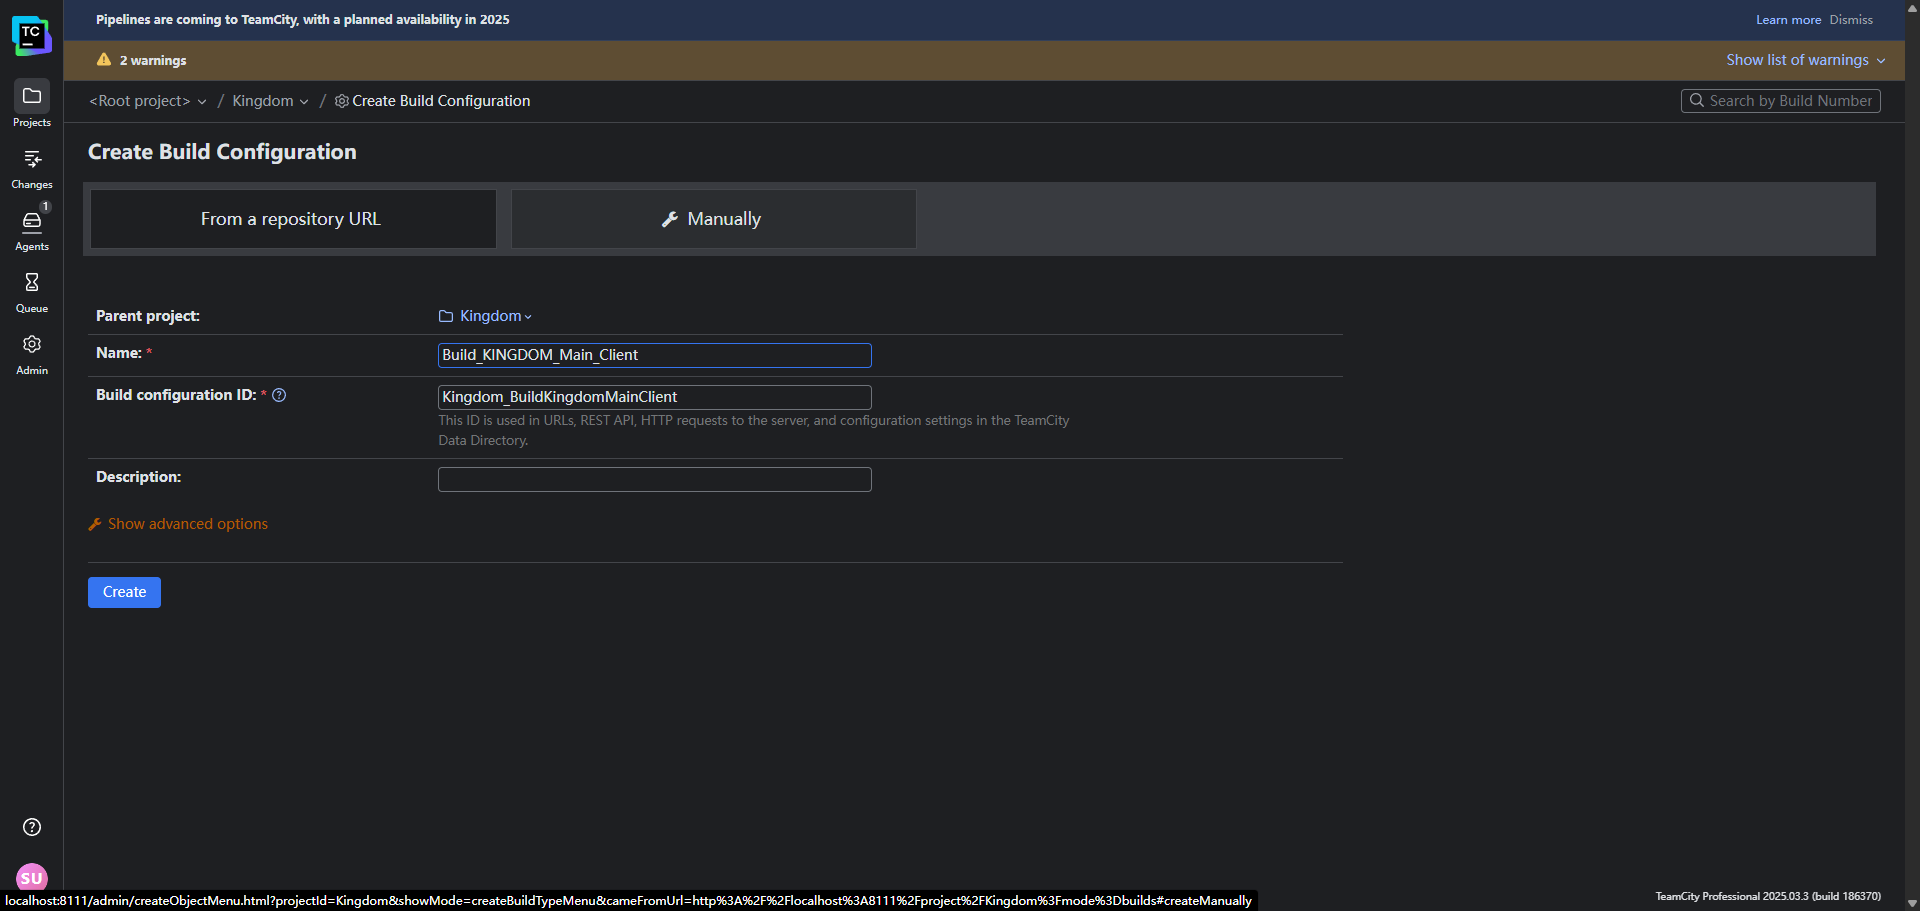
Setup Build Configuration
Now we need to create a build configuration. A build configuration defines how a project should be built, including the build steps, triggers, and parameters. Click on the Build Configurations tab and then click on Create Build Configuration. Amd give it a name
Setup Trigger
Next we need to set up a build trigger. A build trigger is an event that initiates a build process. In this case, we will set up a trigger that starts the build process whenever changes are detected in our version control system (e.g., P4V).
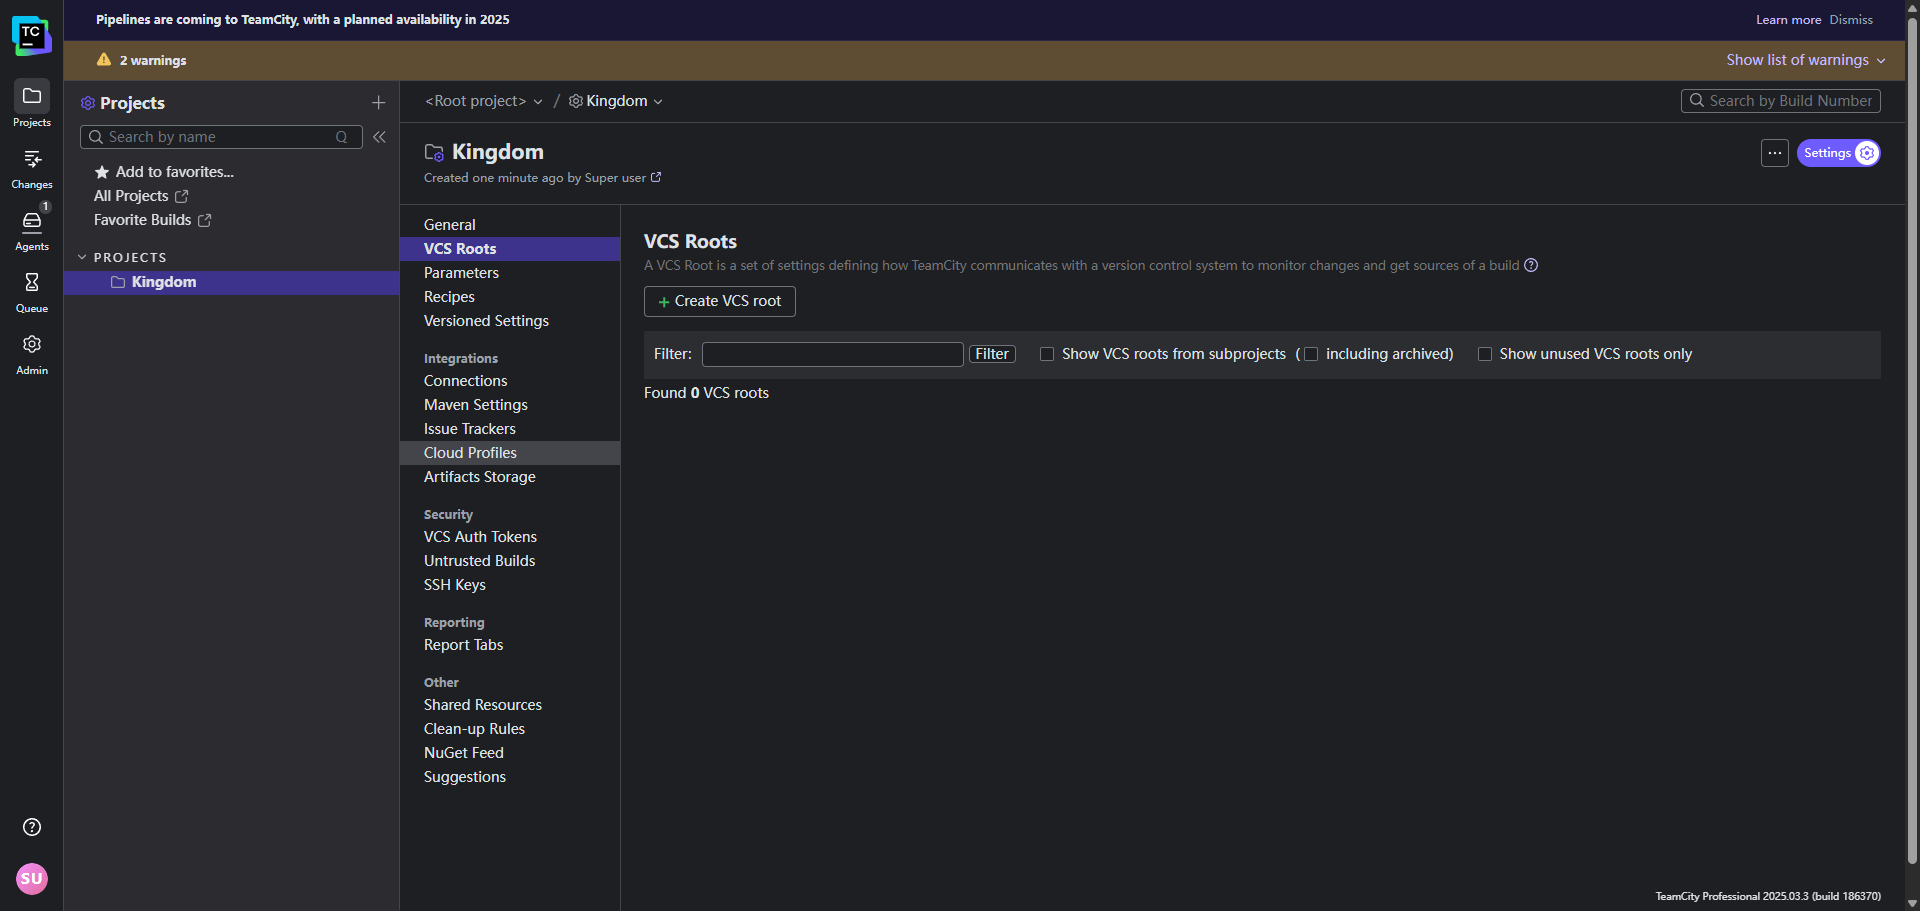
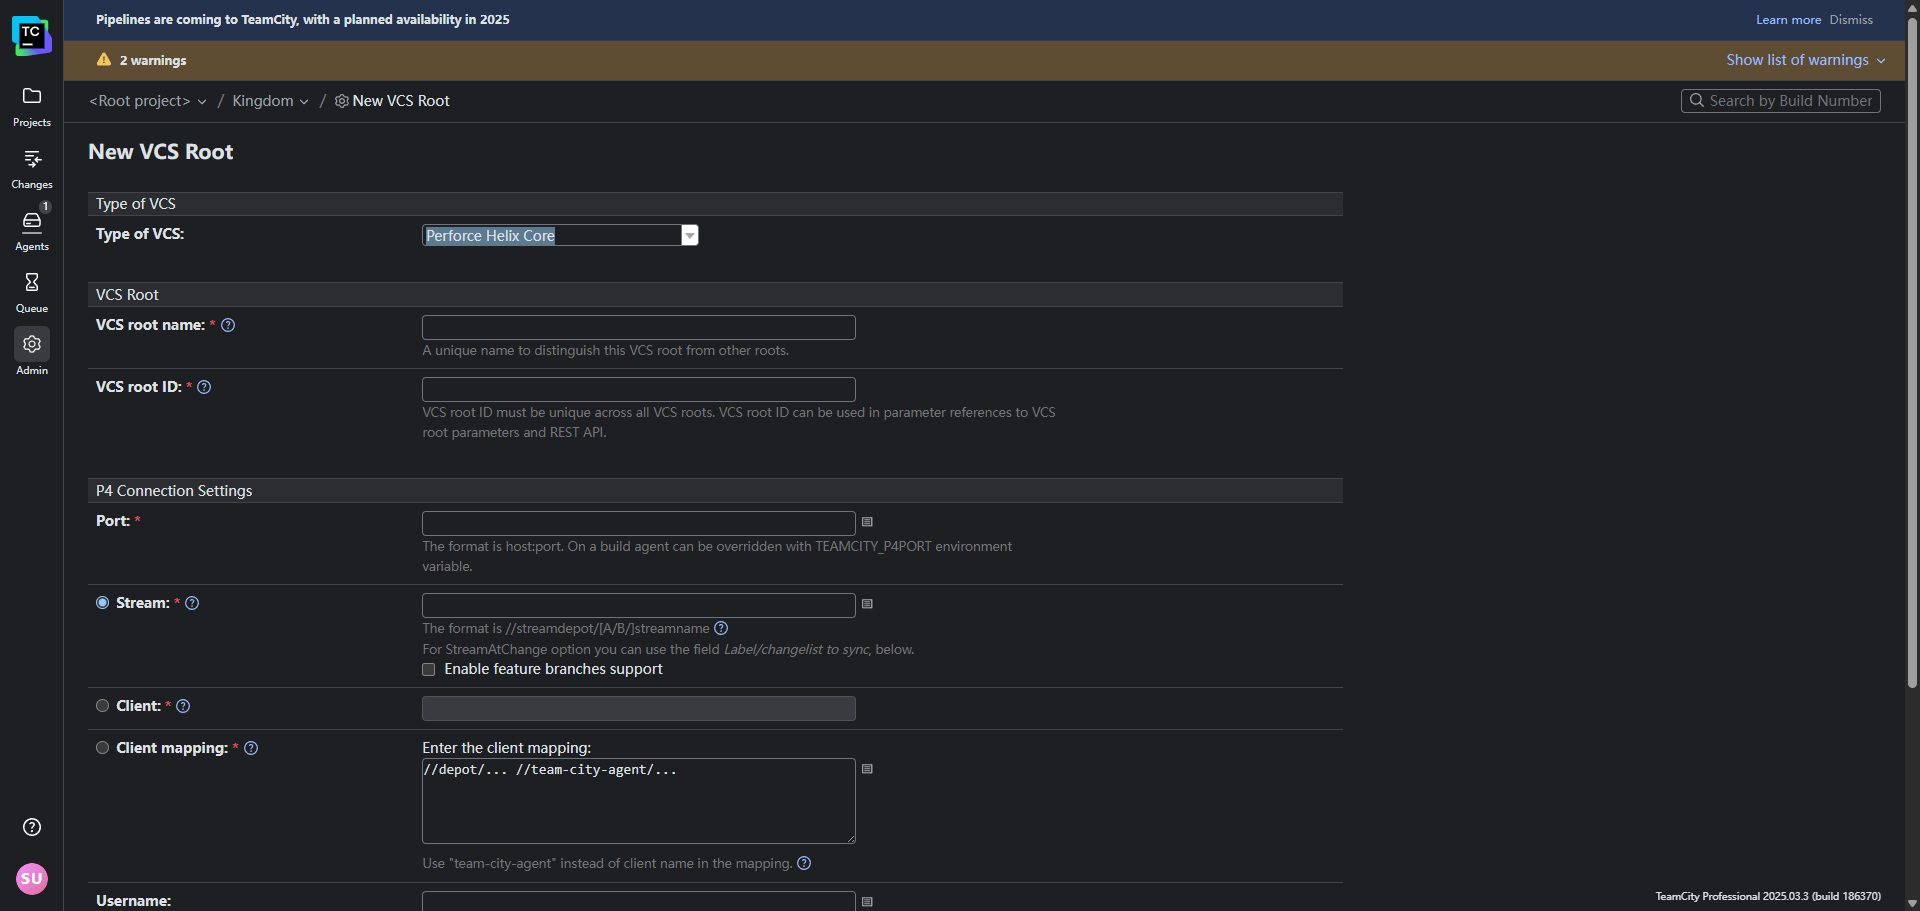
Open the project we just created, and click the VCS Roots tab. Click on Create VCS Root, and select Perforce as the type. Fill in the details for your Perforce server, including the server address, port, and credentials. Make sure to test the connection to ensure everything is set up correctly.
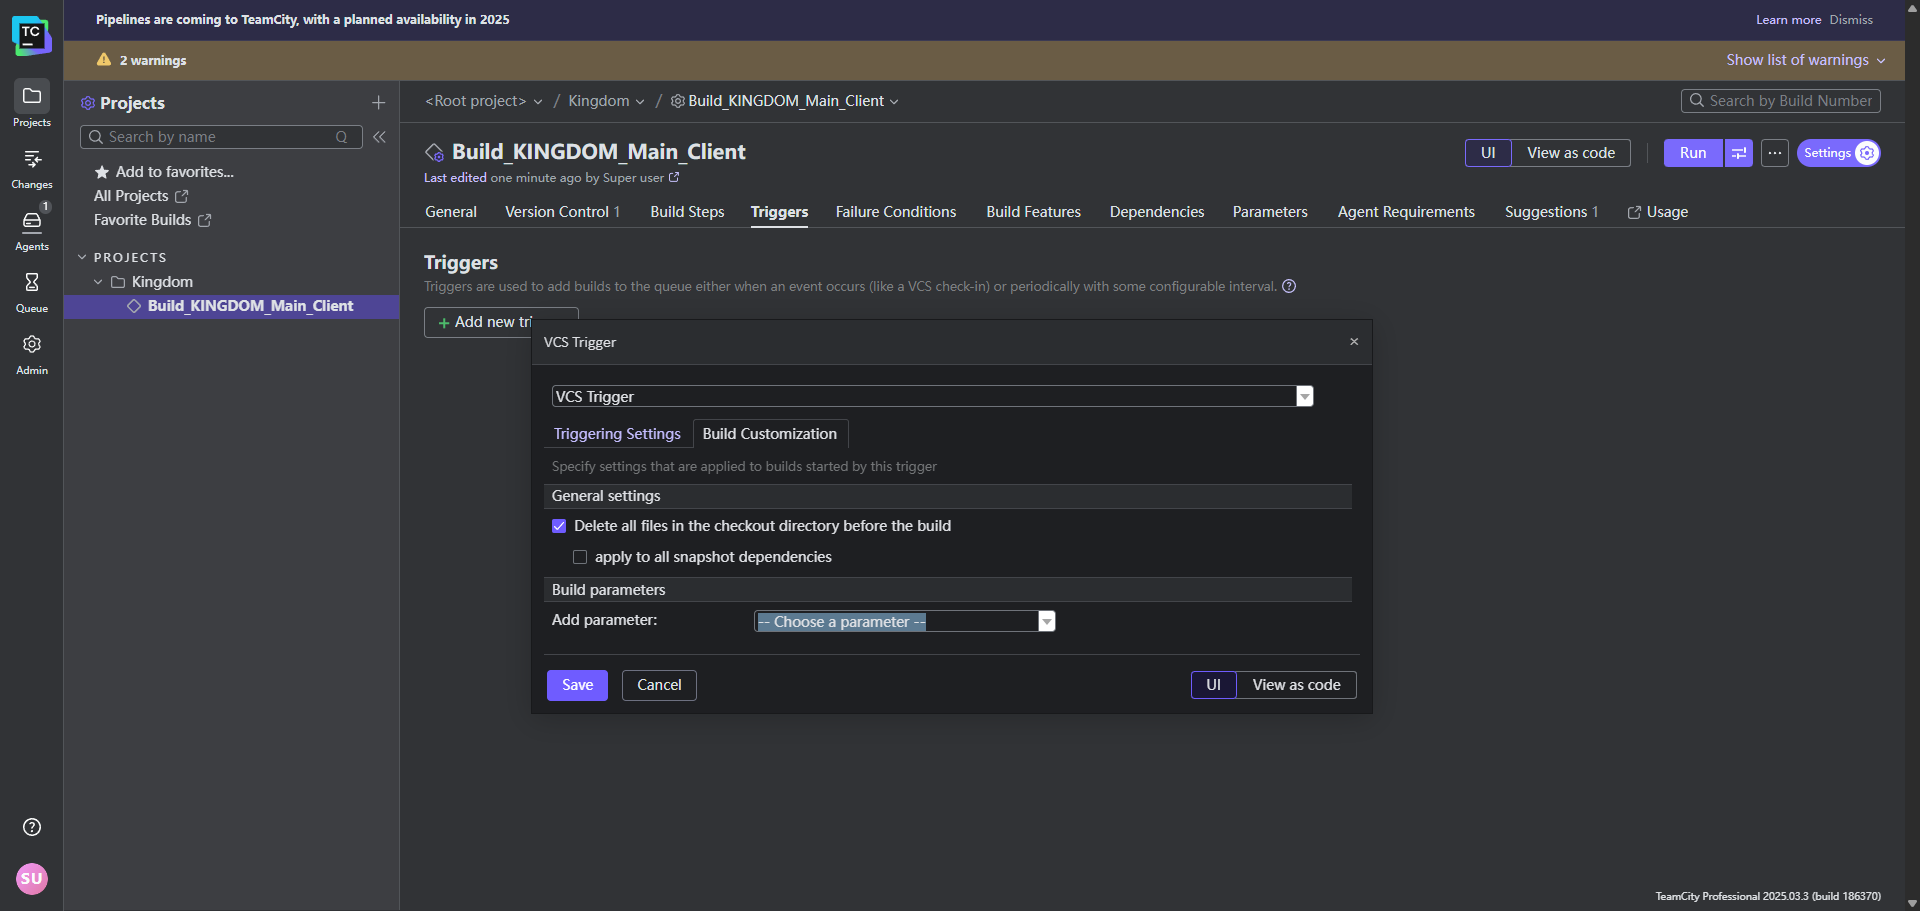
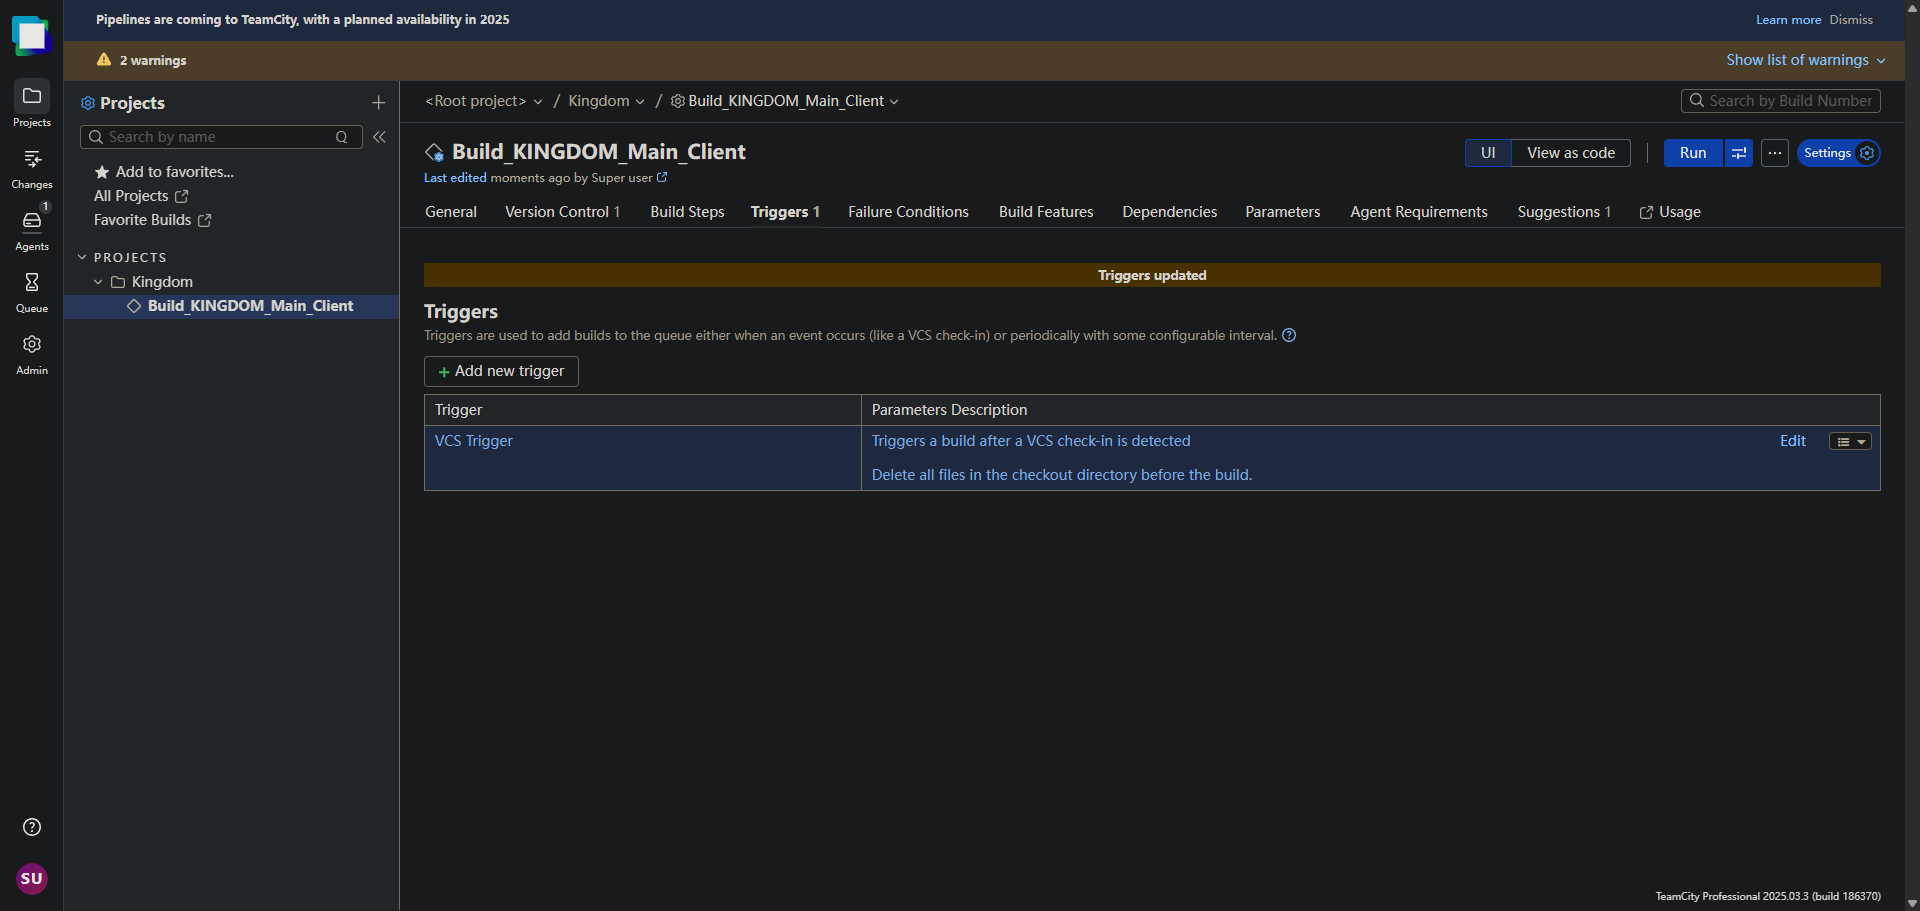
That’s not done yet, we just told TeamCity where to find the source code, now we need to tell it when to trigger the build. Go back to the Build Configuration tab, and click on Triggers. Click on Add new trigger, and select VCS Trigger. This will automatically start a build whenever changes are detected in the specified VCS root.
I also customized it a bit to delete local checked out files before the build starts, this could happen if we let BM to run some post-fetch scripts that modify the files, they could be left behind and cause issues in the next build. So I just set it to delete all files in the workspace before the build starts.
Setup Build Steps
Now we need to define the build steps. A build step is a single action performed during the build process, such as compiling code, running tests, or packaging the project. Click on the Build Steps tab and then click on Add build step.
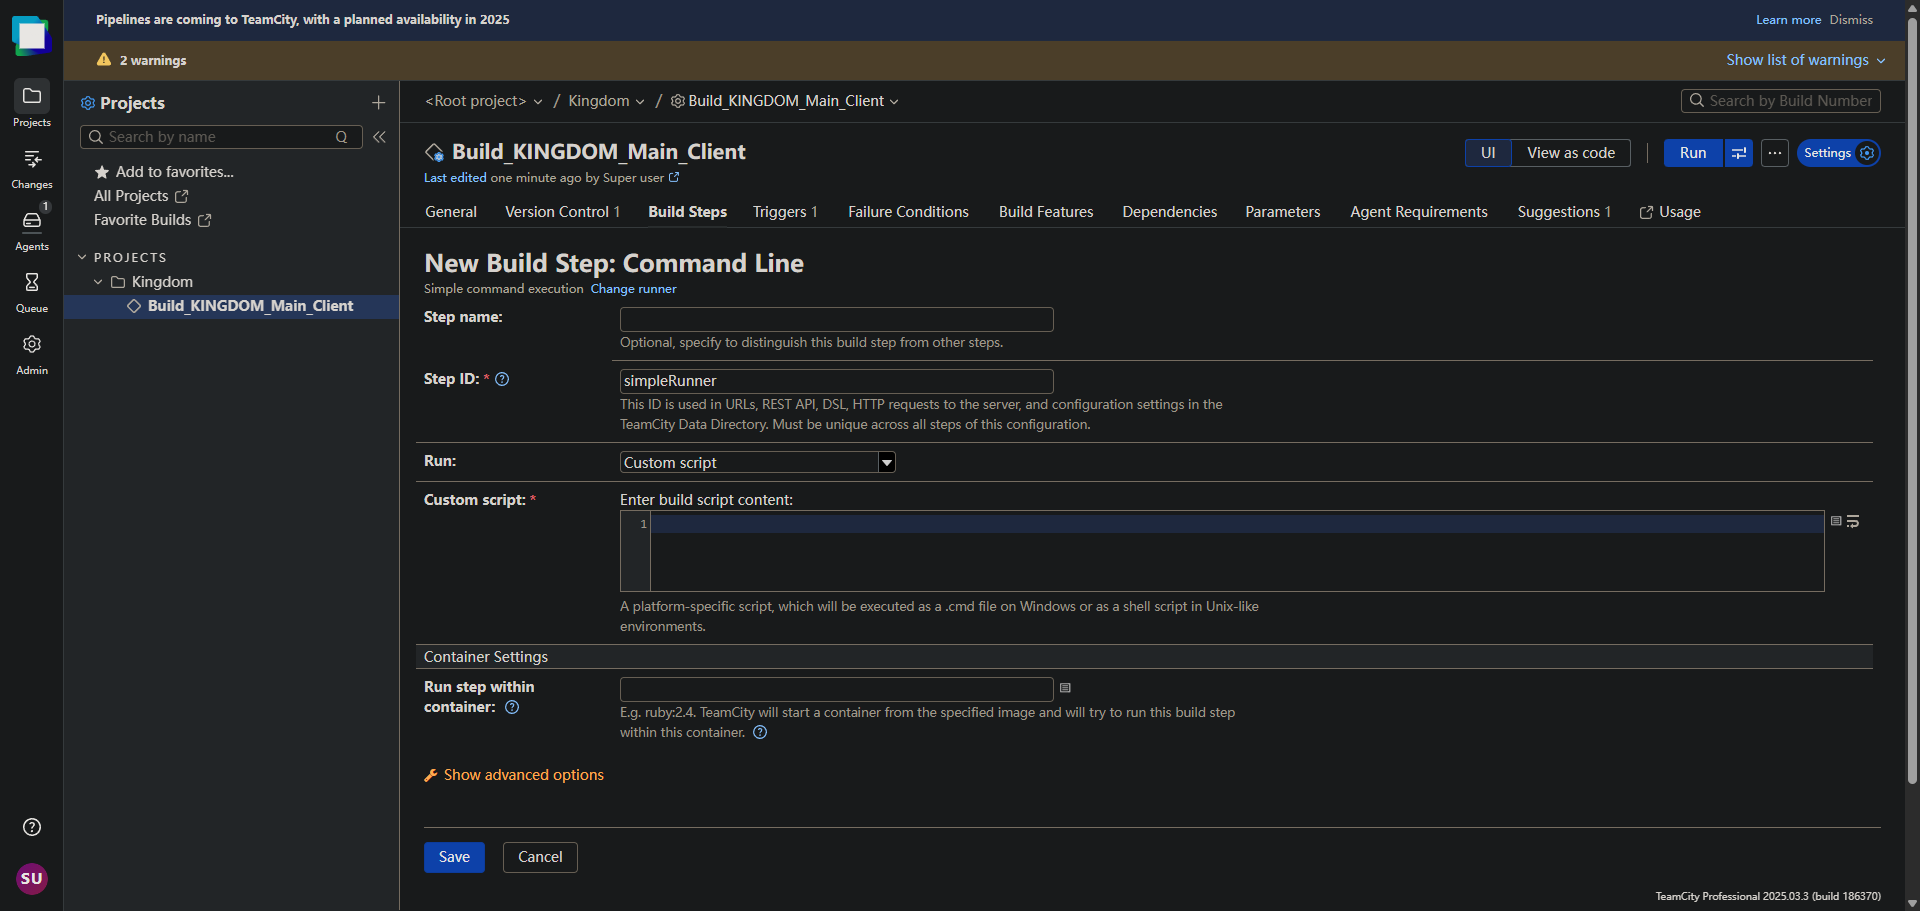
Right now, we can just type
1
echo "Triggered By New Changelist!"
at the command line, and click Run. This will just print a message to the console, indicating that the build step was executed successfully.
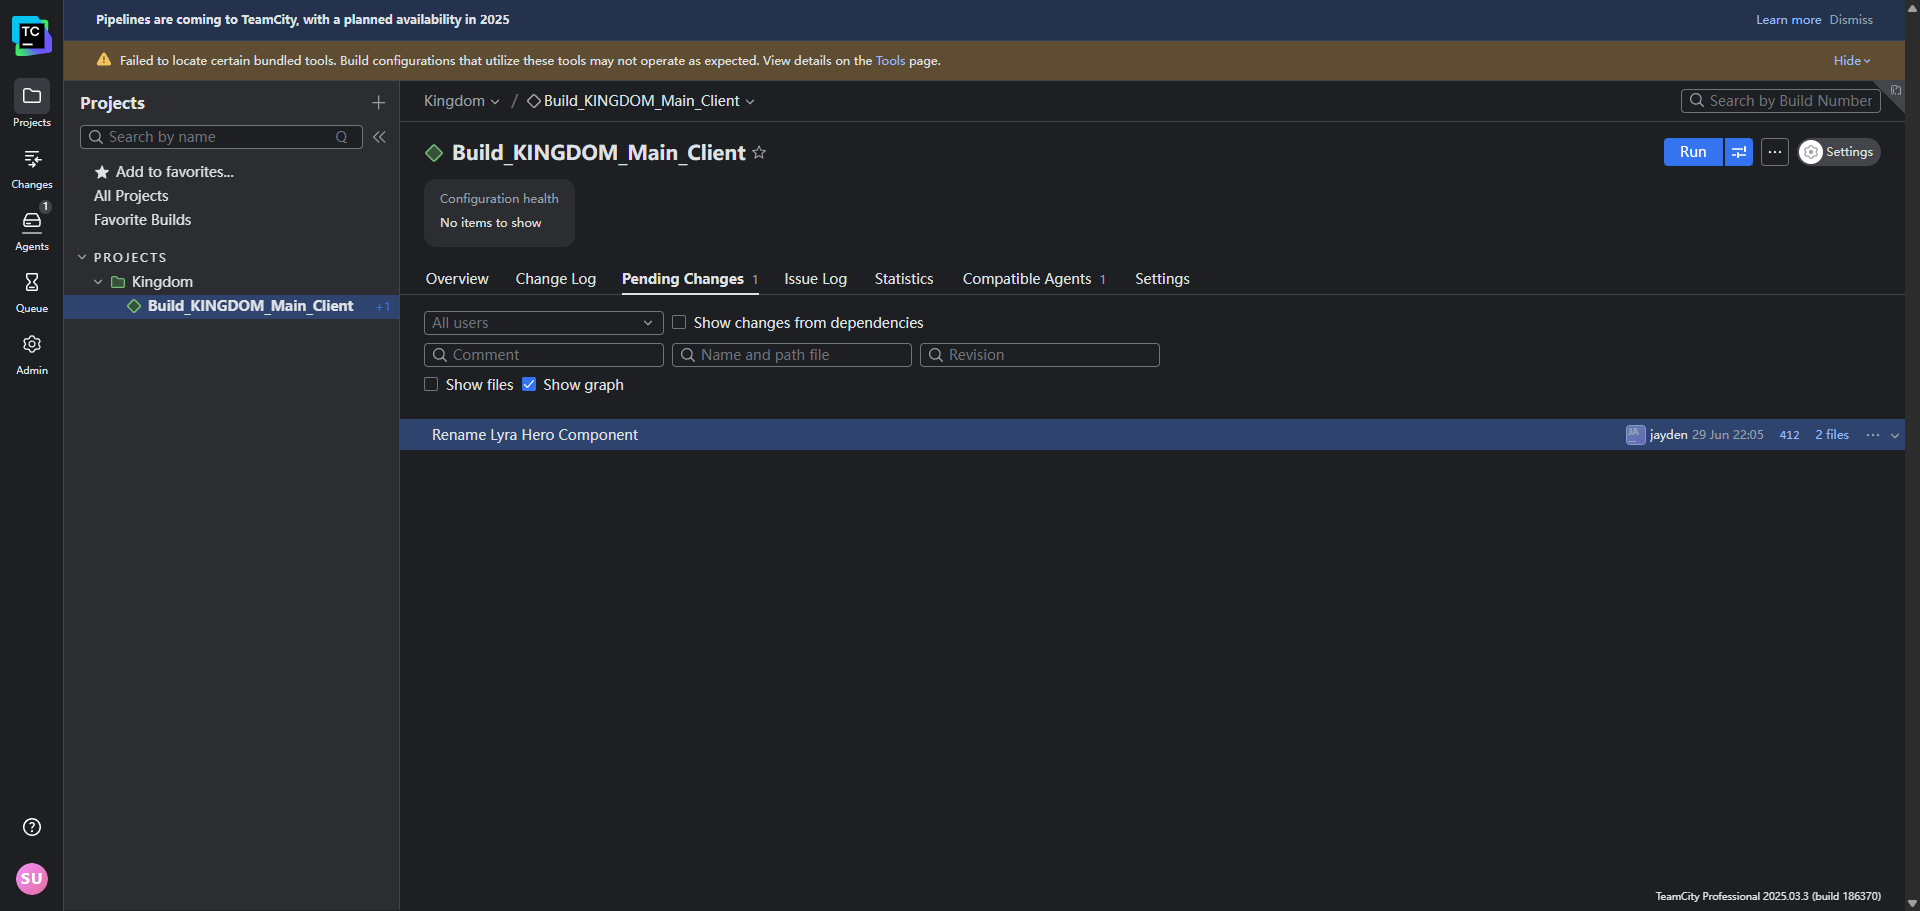
Push another CL for testing
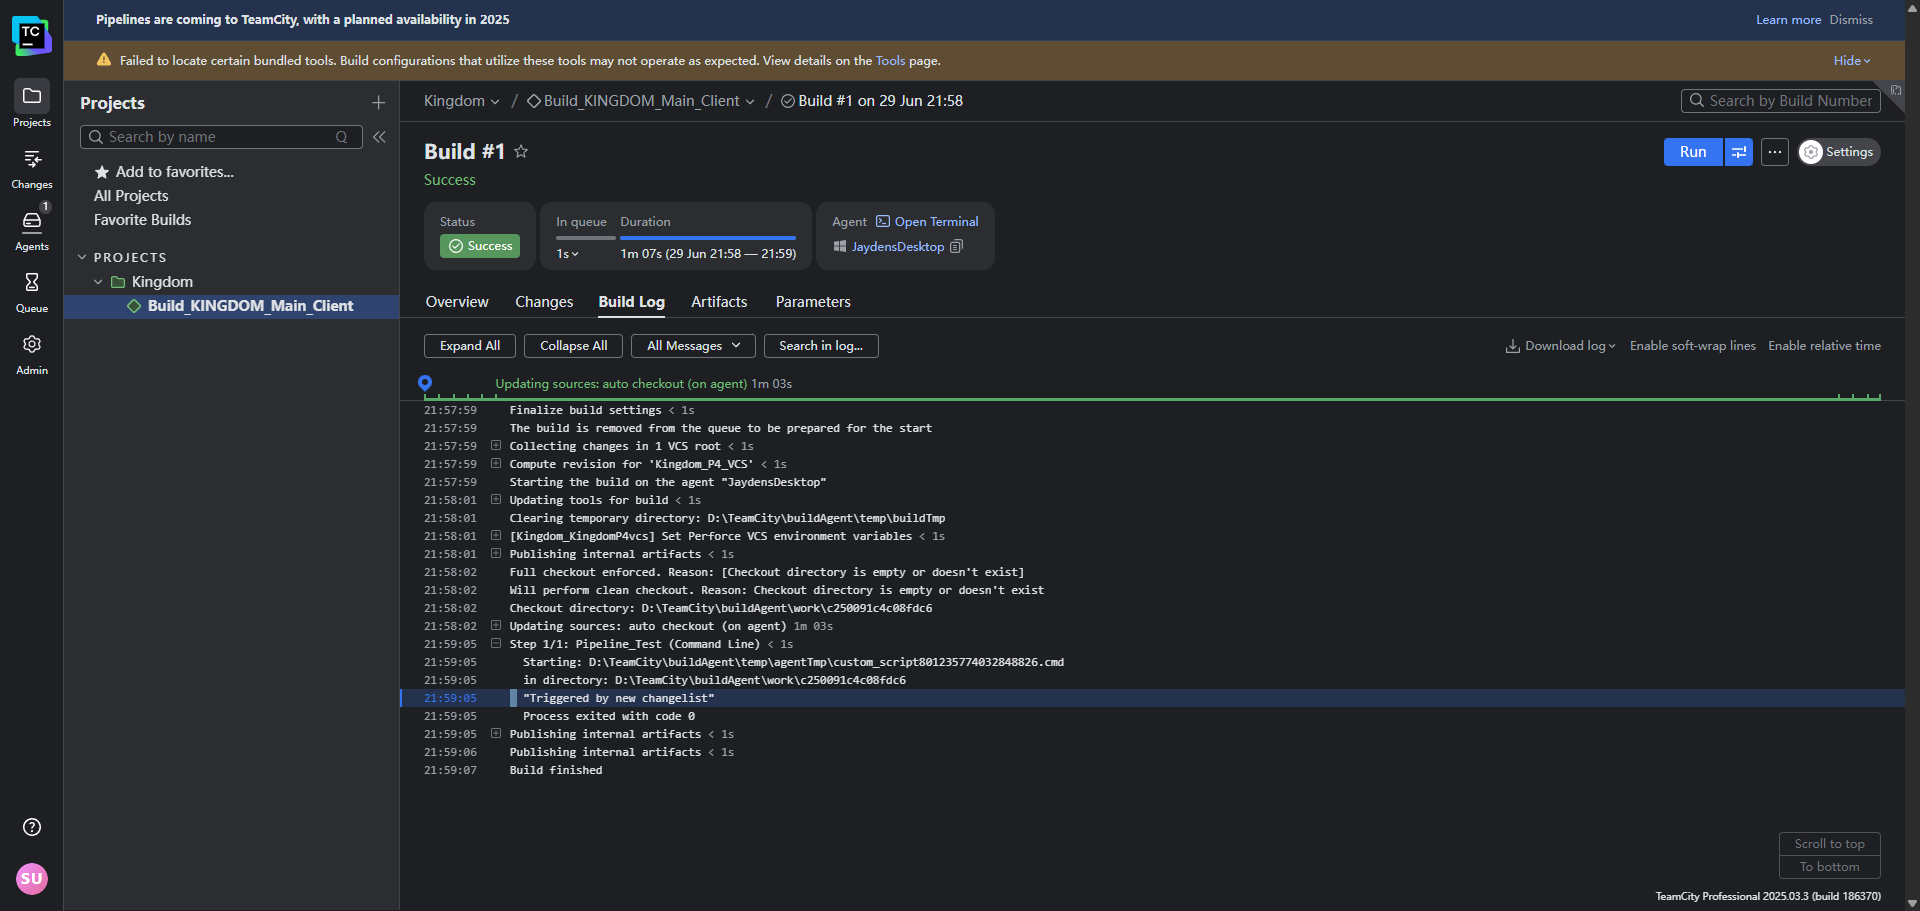
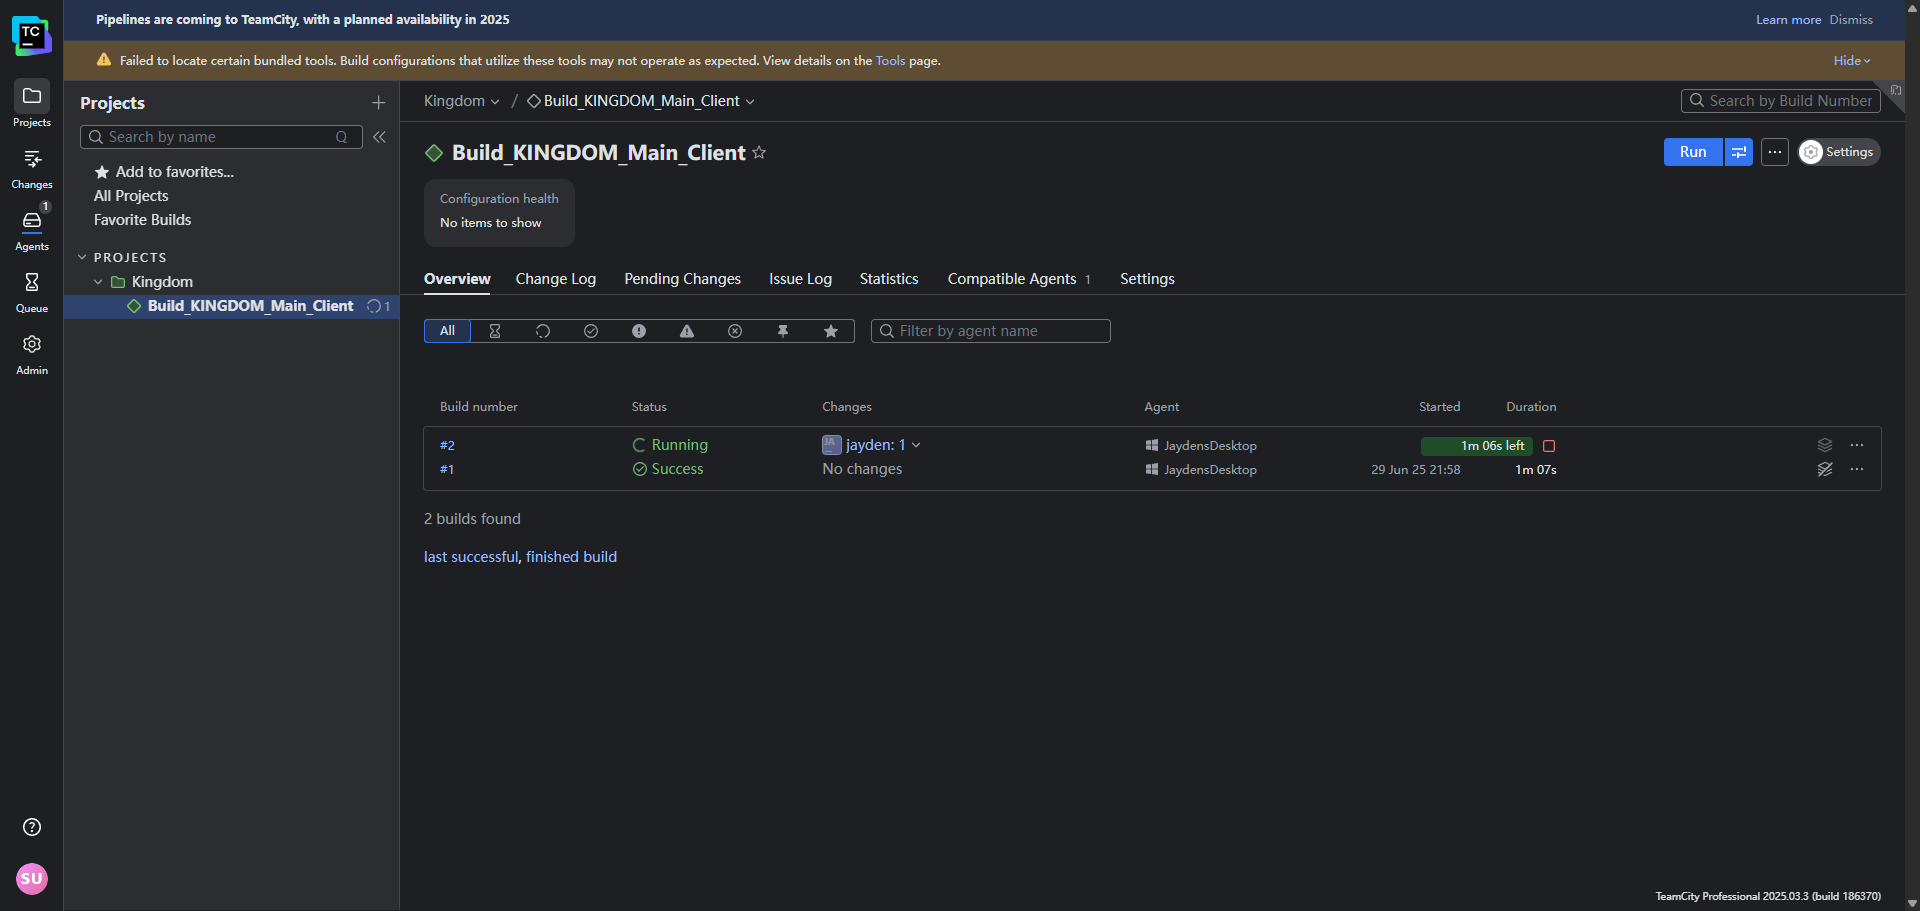
Now we can push another CL to our P4V server, and TeamCity will automatically detect the changes and trigger a build. You can check the build status in the Build Queue tab.
Here I’m using my Mac to submit a changelist through P4V normally. And whola, TeamCity detected the change and triggered a build automatically.
Run Build Command
To this point, we have set up a basic build configuration that triggers a build whenever changes are detected in our version control system. However, we still need to define the actual build steps for our Unreal Engine project.
To do this, we will add a build step that runs the Unreal Build Tool (UBT) to compile the project. Click on the Build Steps tab and then click on Add build step. Select Command Line as the runner type. Then type in:
1
2
3
4
5
6
7
8
9
10
11
12
13
CALL "%ue_root%\Engine\Build\BatchFiles\RunUAT.bat" ^
  BuildCookRun ^
  -project="%teamcity.build.checkoutDir%\%project_name%\%project_name%.uproject" ^
  -noP4 ^
  -platform=%platform% ^
  -clientconfig=%build_config% ^
  -serverconfig=%build_config% ^
  -build ^
  -cook ^
  -pak ^
  -stage ^
  -archive ^
  -archivedirectory="%teamcity.build.checkoutDir%\%project_name%\%output_dir%"
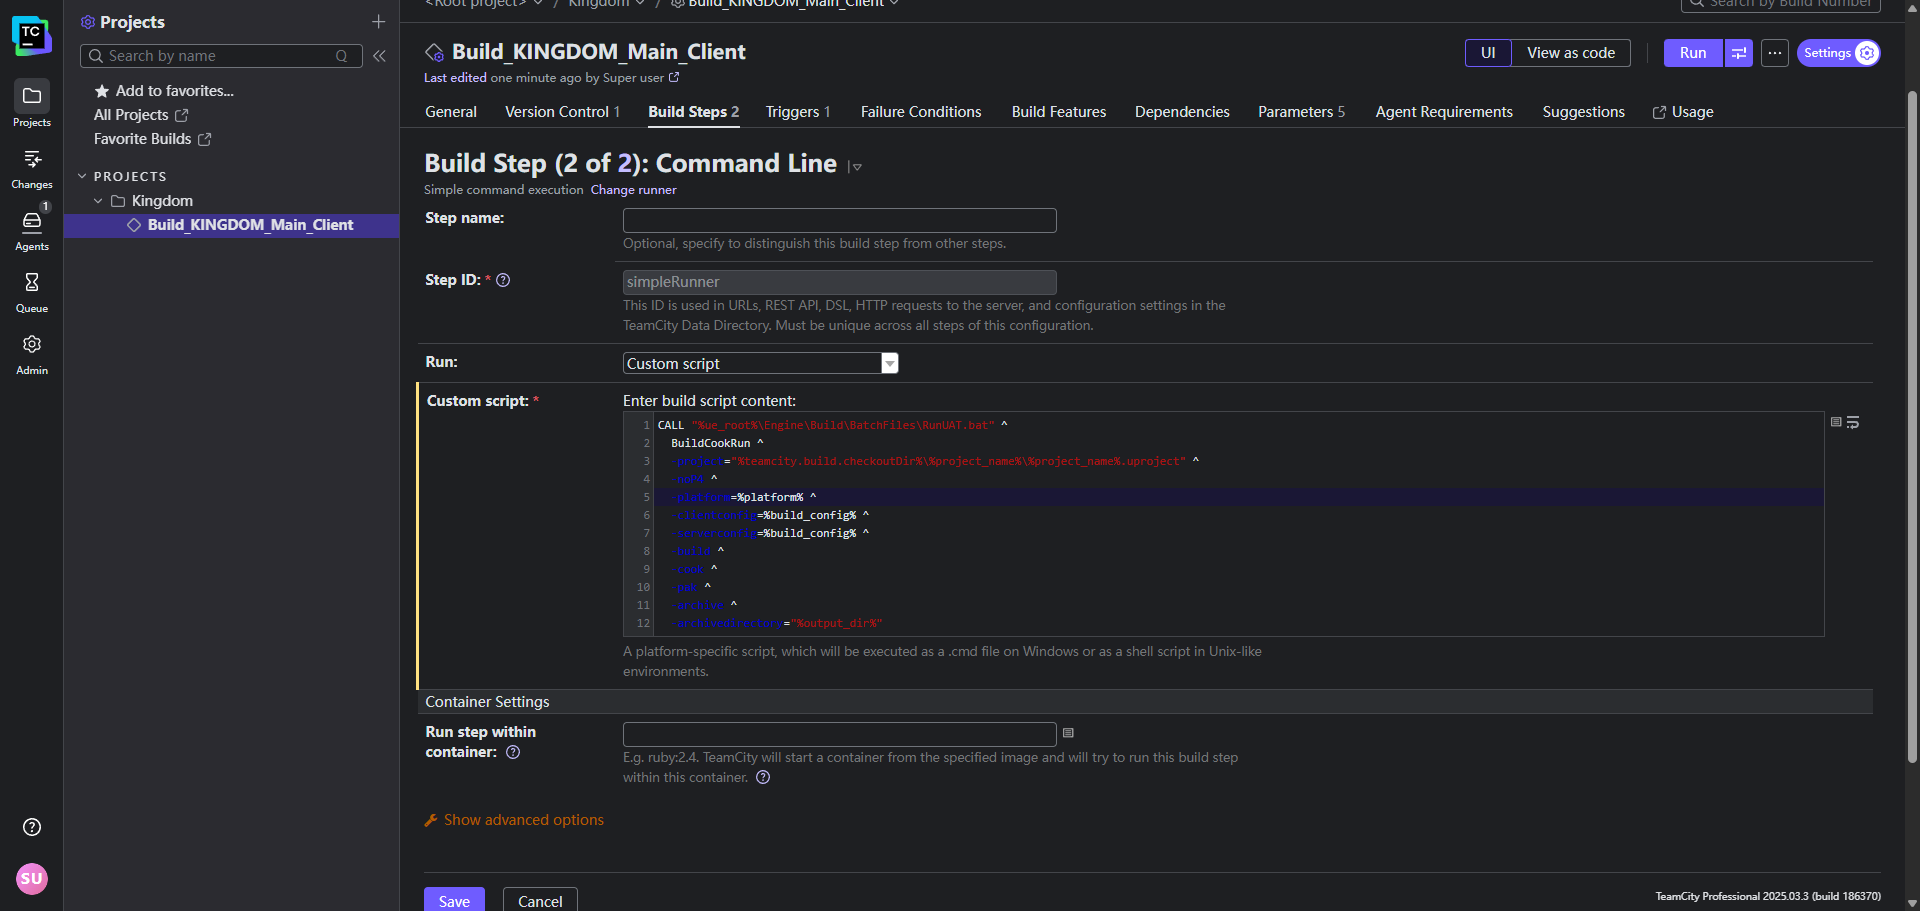
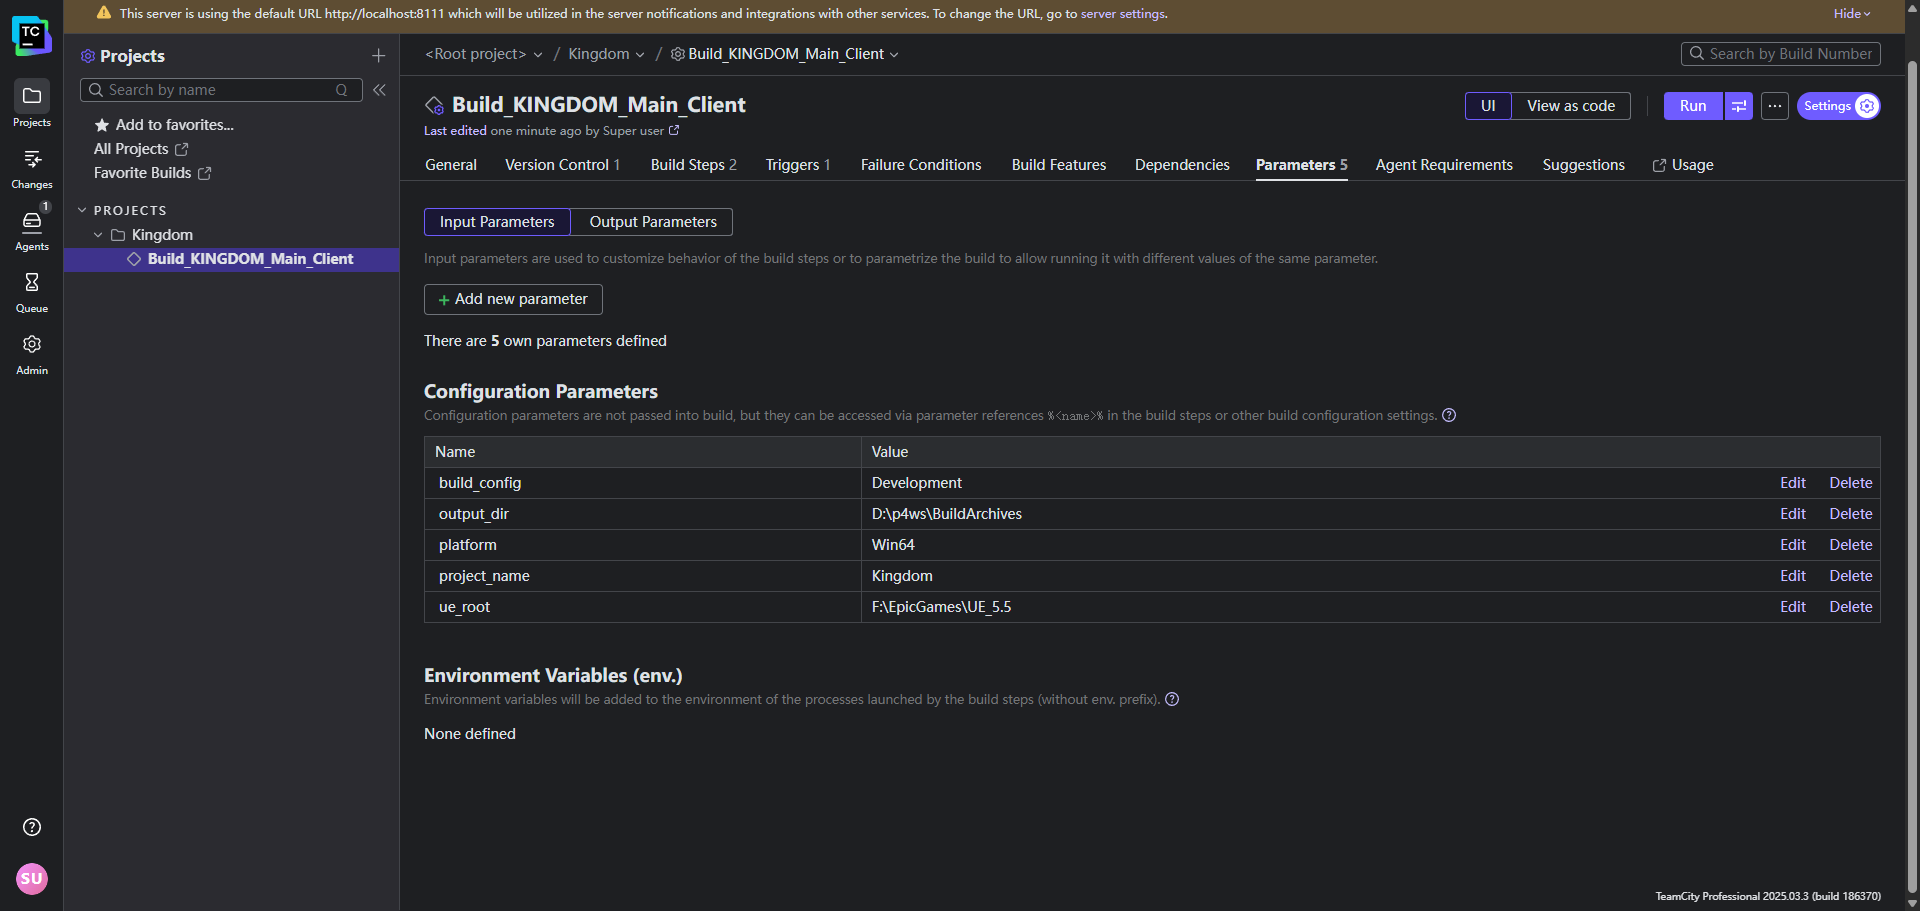
We try not to hardcode the paths, so we will use some TeamCity parameters to make it more flexible. We can define these parameters in the Parameters tab of the build configuration.
Correction: I changed the value of
output_dirtoArtifacts, and also updated the-archivedirectoryparameter above accordingly. This ensures that the build artifacts are stored in theArtifactsdirectory under the localCheckoutfolder of the BuildAgent, making them easier to manage and access.
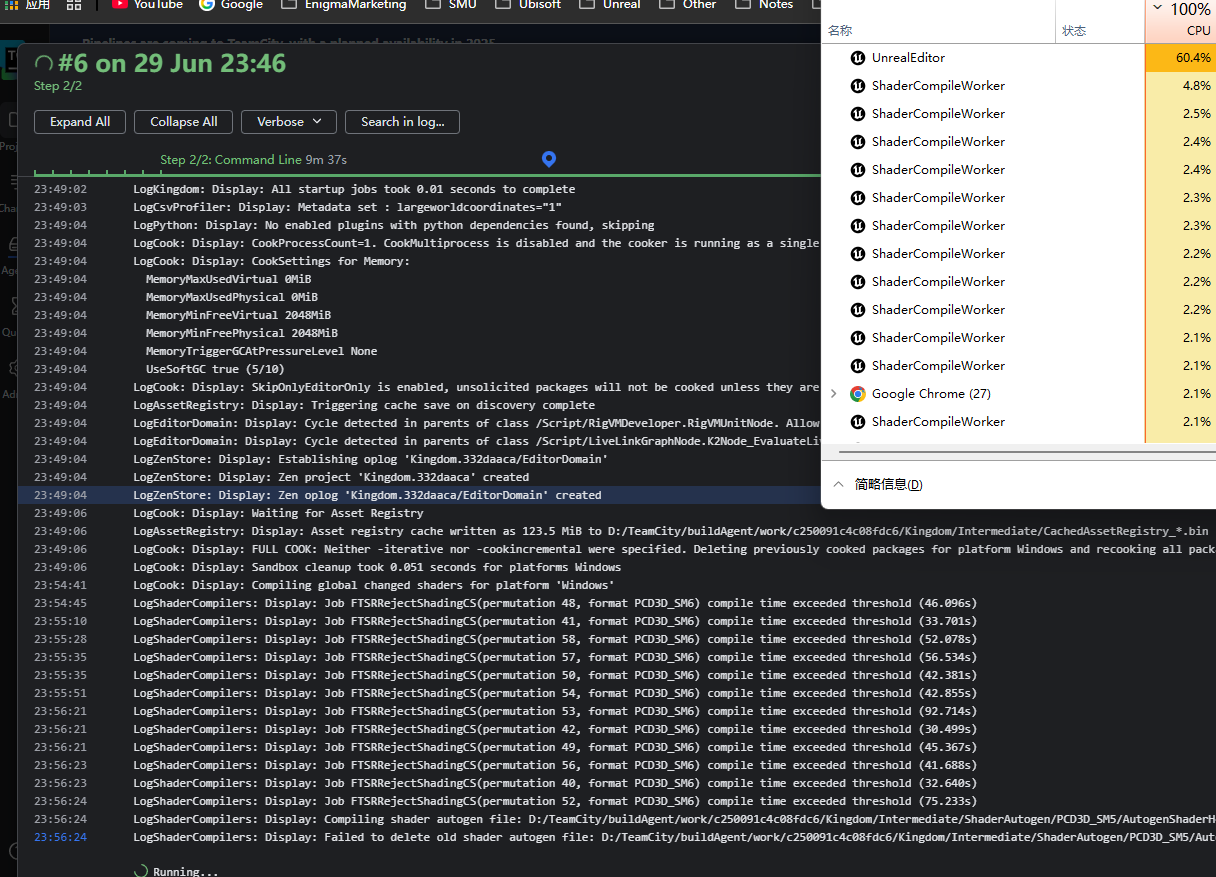
Hit Run for a test drive, and you should see the build process starting. TeamCity will execute the UBT command, compile the project, cook the assets, and package the game. You can monitor the progress in the Build Log tab. (CPU is melting, so definitely having a separate build machine with powerful CPU is a good idea)
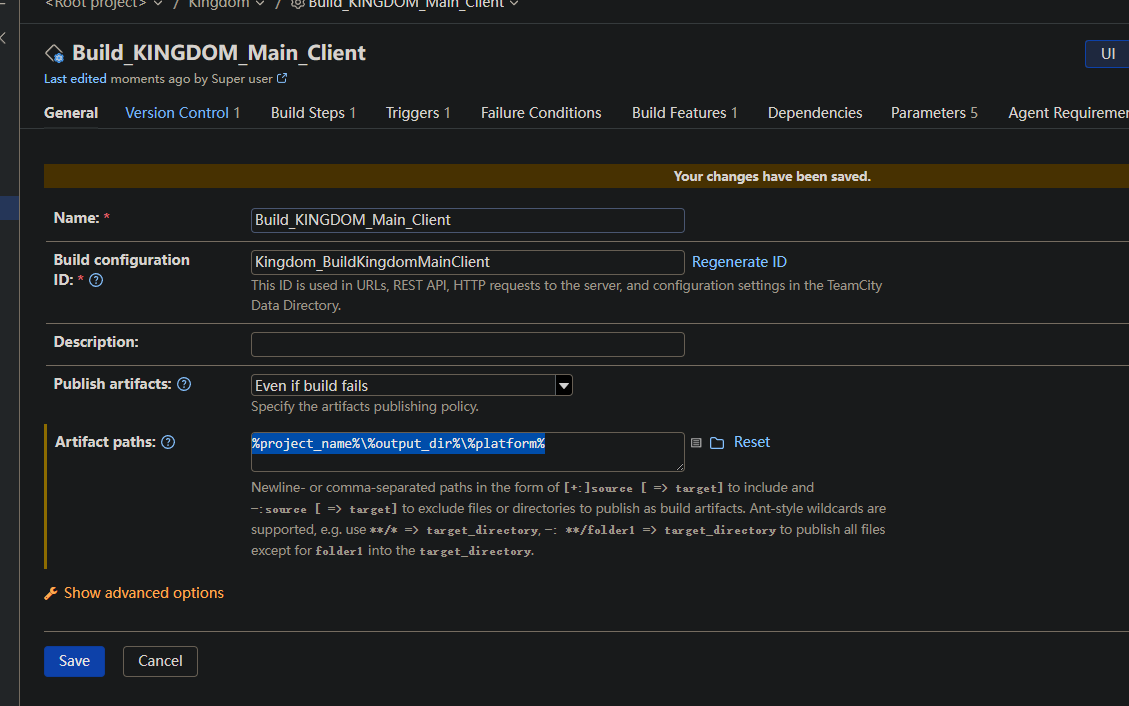
Finally, setup the artifact path to store the packaged game. Click on the General Settings tab, and scroll down to the Artifact Paths section. Here, you can specify where the build artifacts should be stored. For example, you can set it to:
1
\%project_name%\%output_dir%\%platform%\
Auto Notification
Once the build is complete, you can find the packaged game in the specified output directory. TeamCity will also store the build artifacts, which you can access from the Artifacts tab.
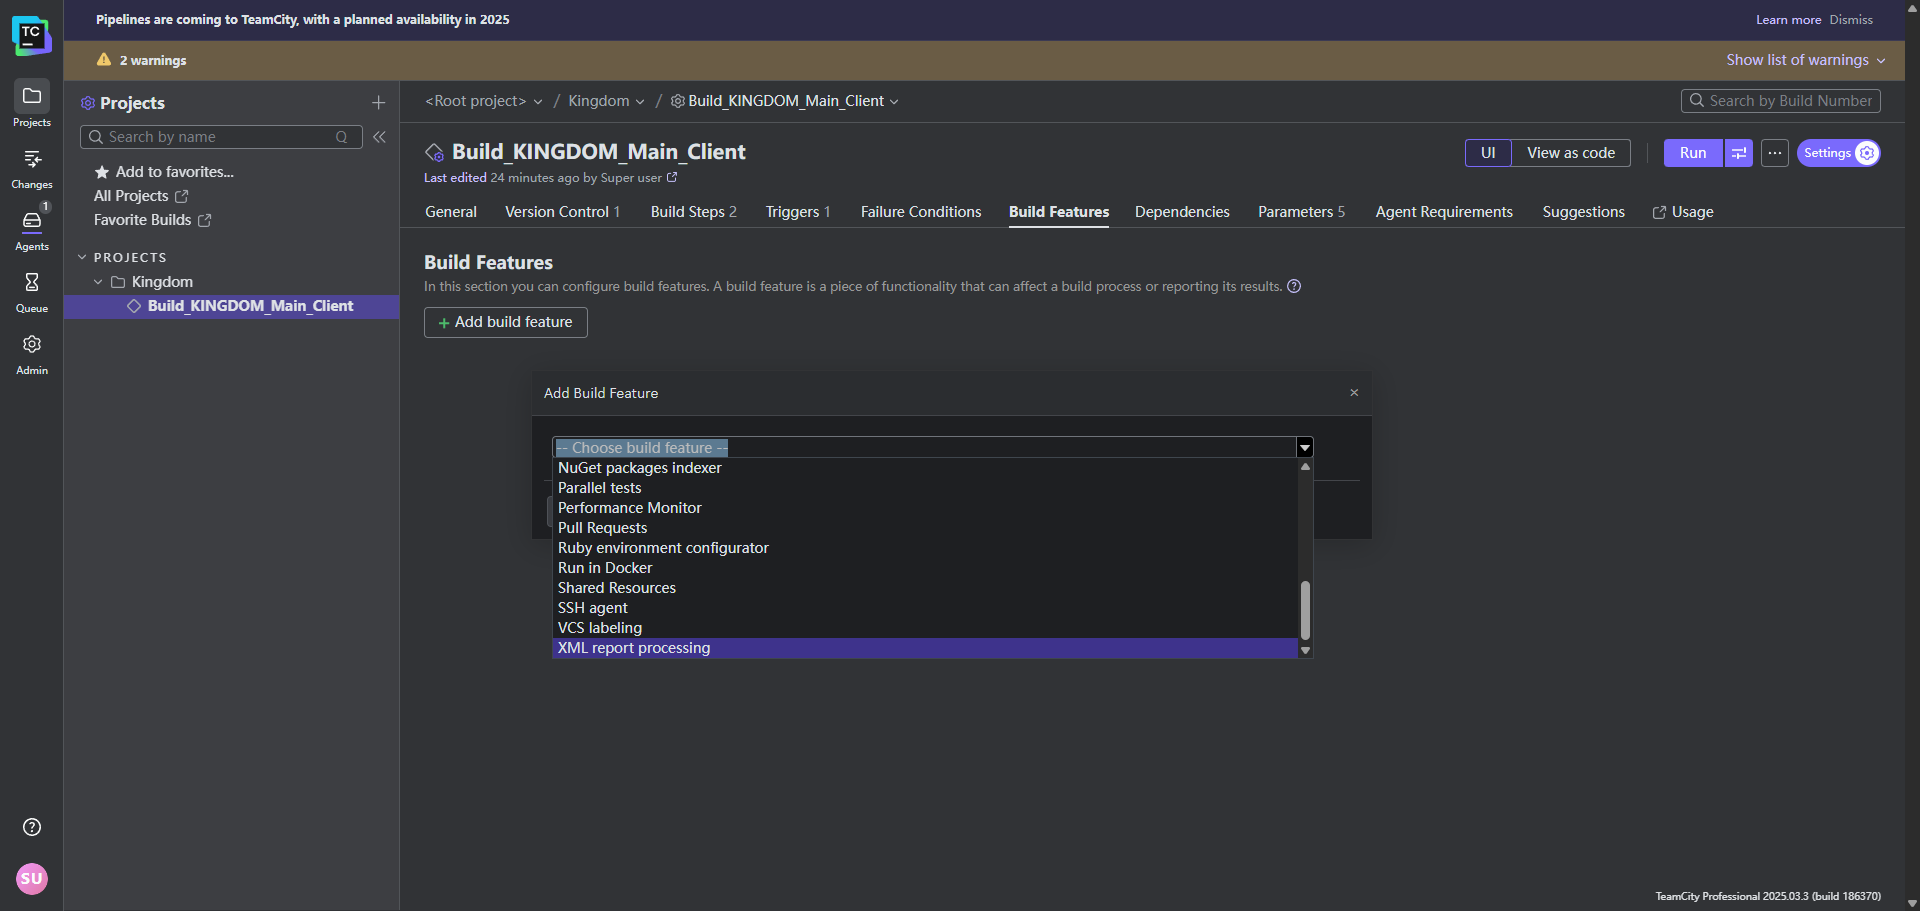
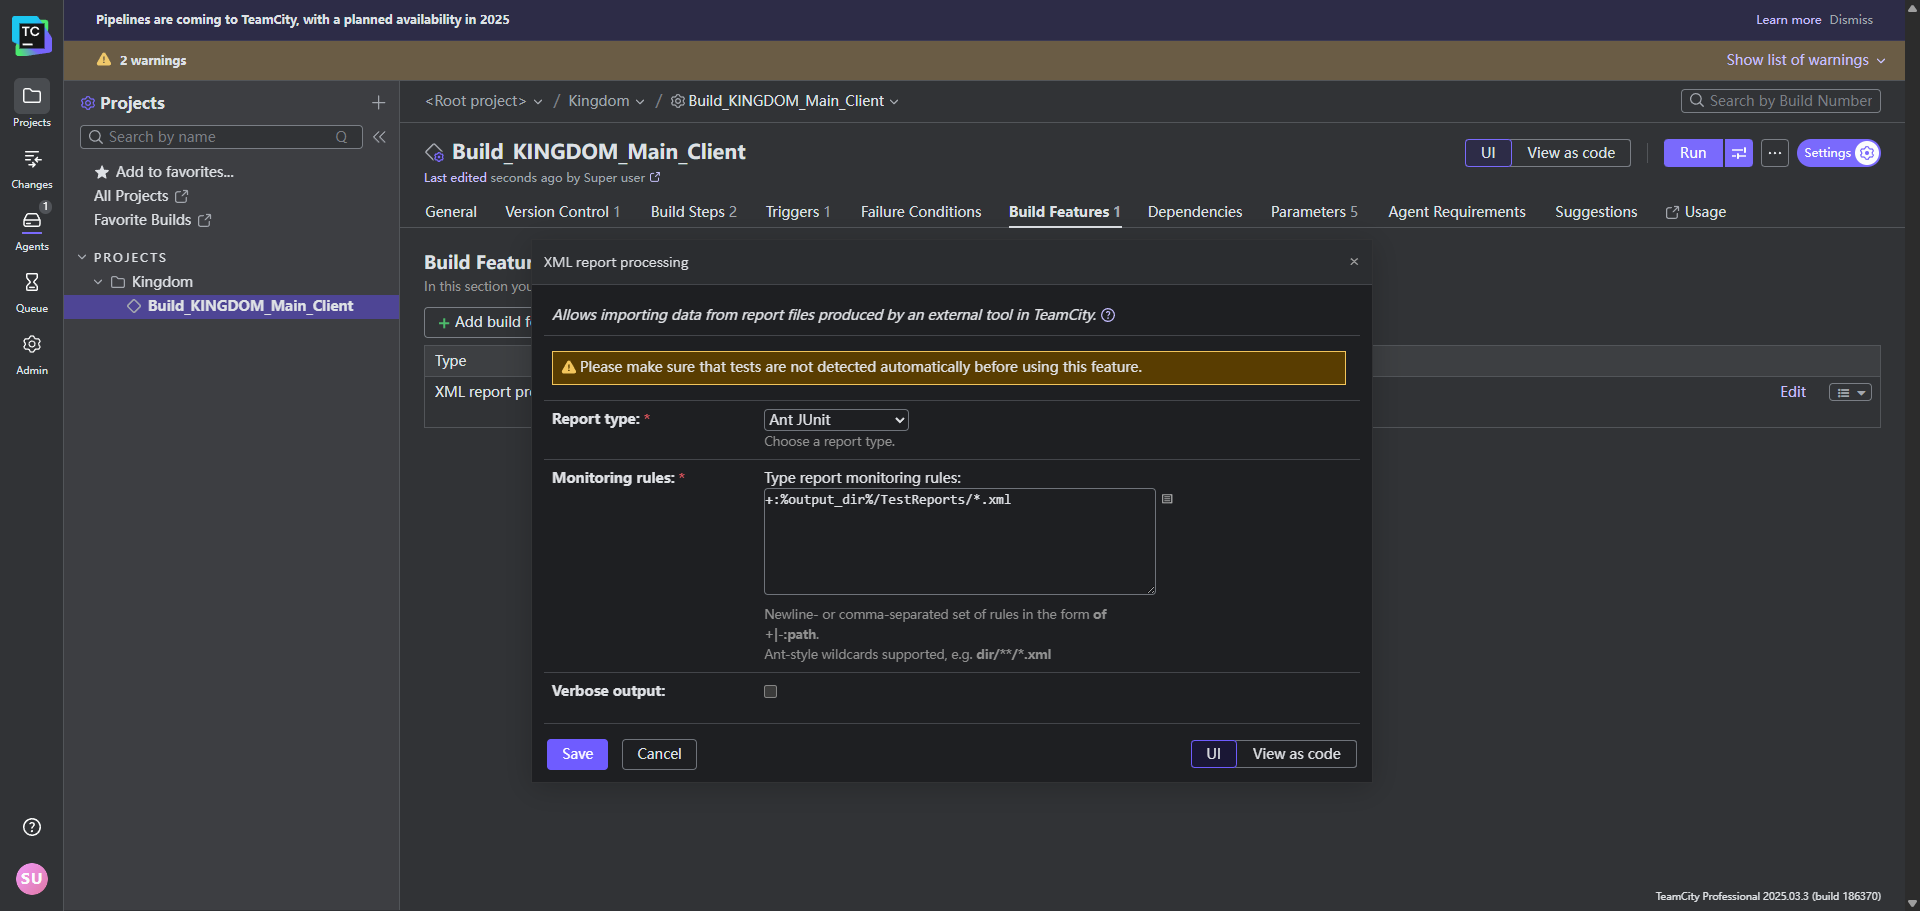
Before we wrap up, here’re some more stuff we could potentially do. A very practical follow up would be utilizing Unreal Autotest framework Gauntlet, they all support CLI execution, so add them into the build step would essentially give us a full automated build and test pipeline. The results could be exported as XML, and TeamCity can parse the XML and display the test results in a user-friendly format.
Under the report settings window, select report type as Ant JUnit, and set the report path to your test report directory, for example +:%output_dir%/TestReports/*.xml
Then, we will setup a trigger for our user, to do that, we will first create a user
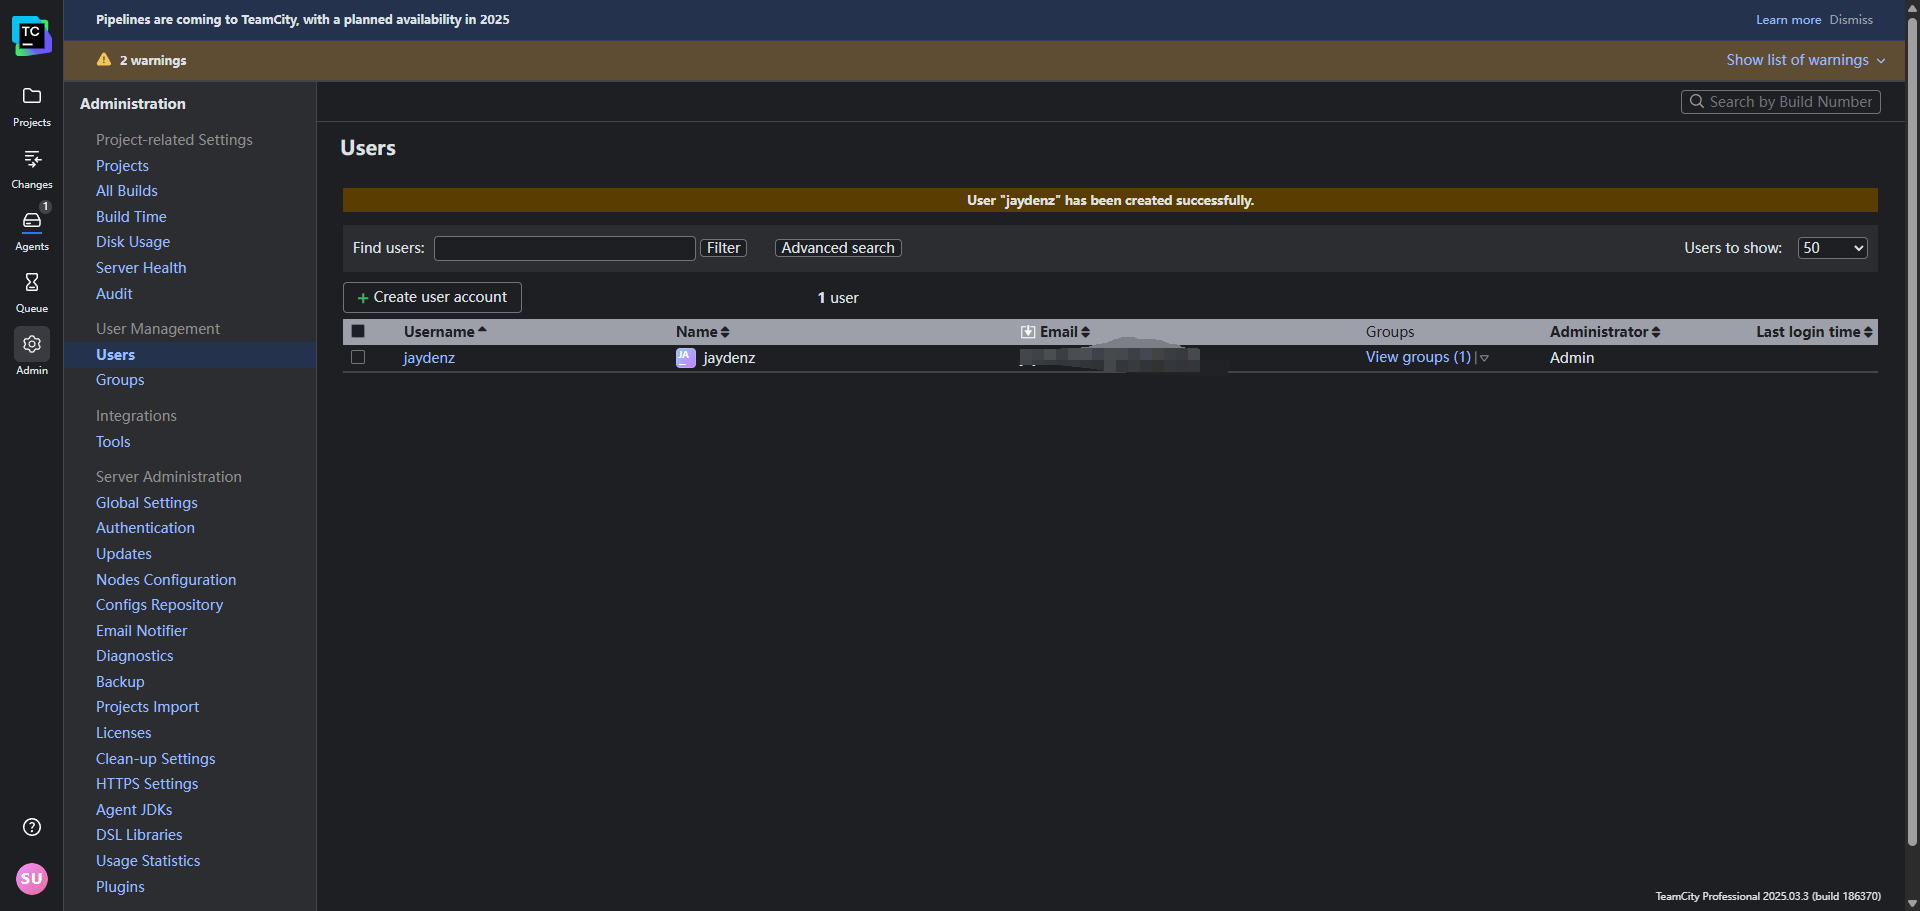
Open up the Users tab, and click on Notification Rules. We can see that there’s already a System Wide Rule inherited, when any build fails that contains my change, or the investigator is me, I will be notified via e-mail. As a indie dev, I want to be notified more frequently to grasp the issues as soon as possible, so I will add a new rule for myself.
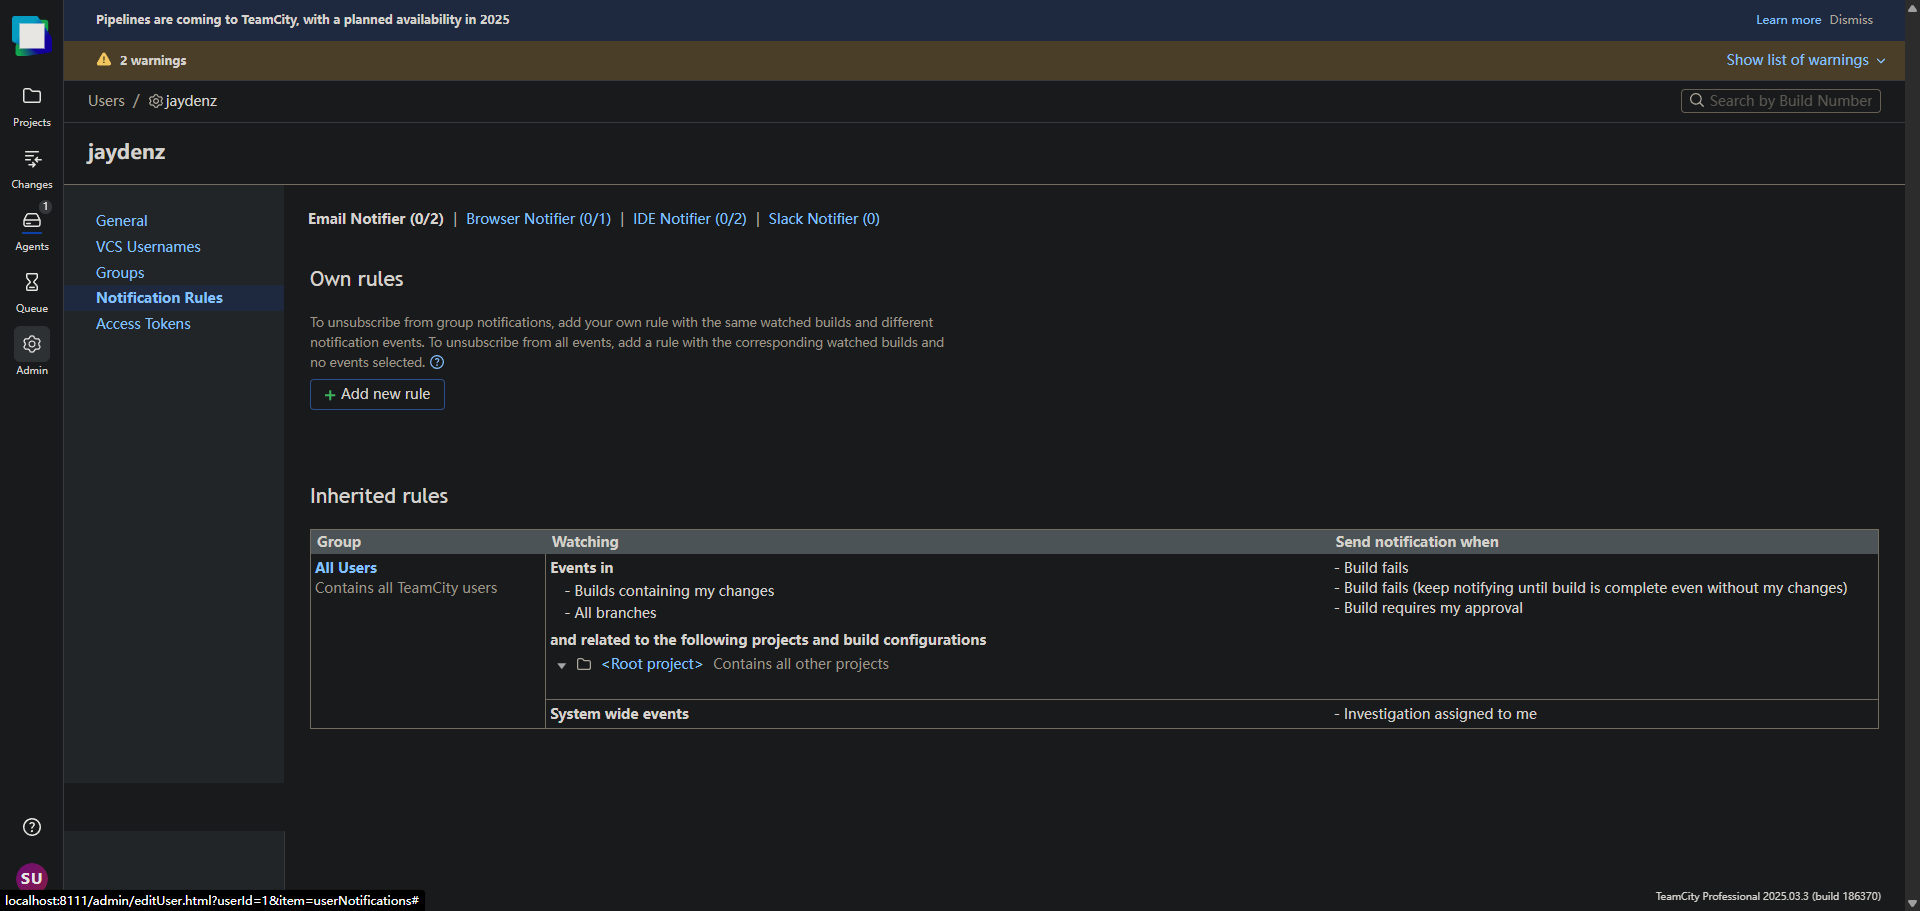
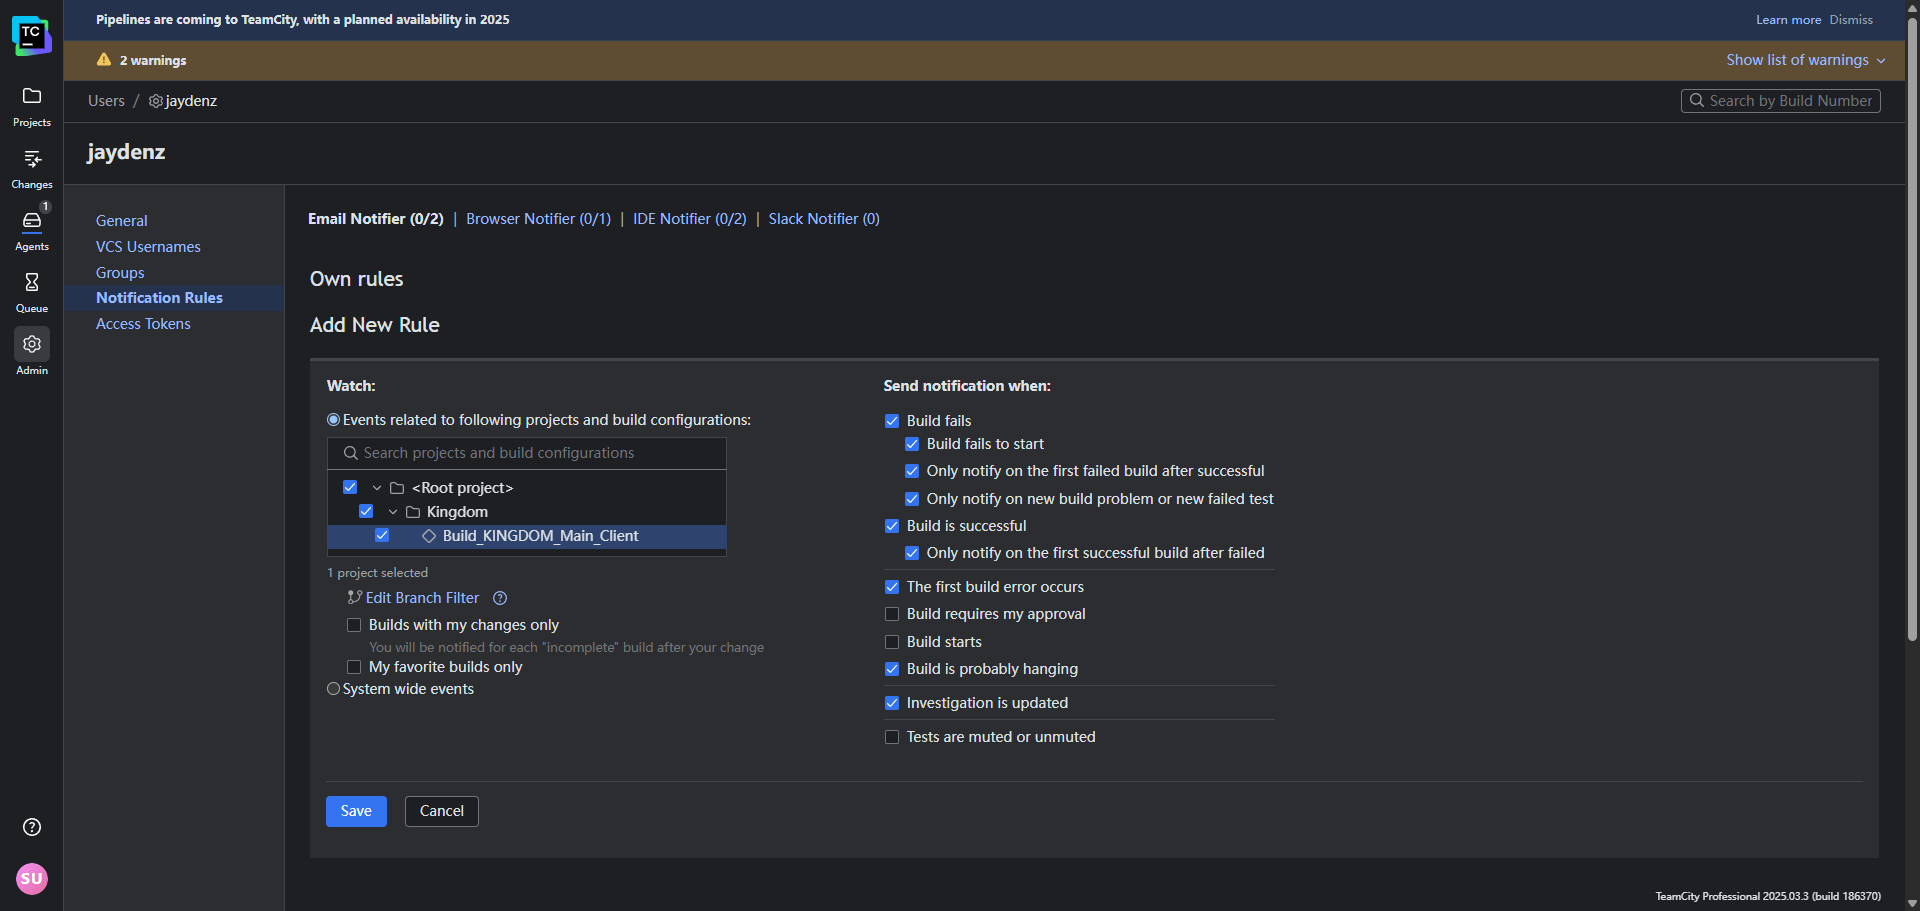
I want to be notified when any build starts, succeeds, or fails, so I will add a new rule for myself. Click on Add new rule, and check all related fields and listen to certain build config.
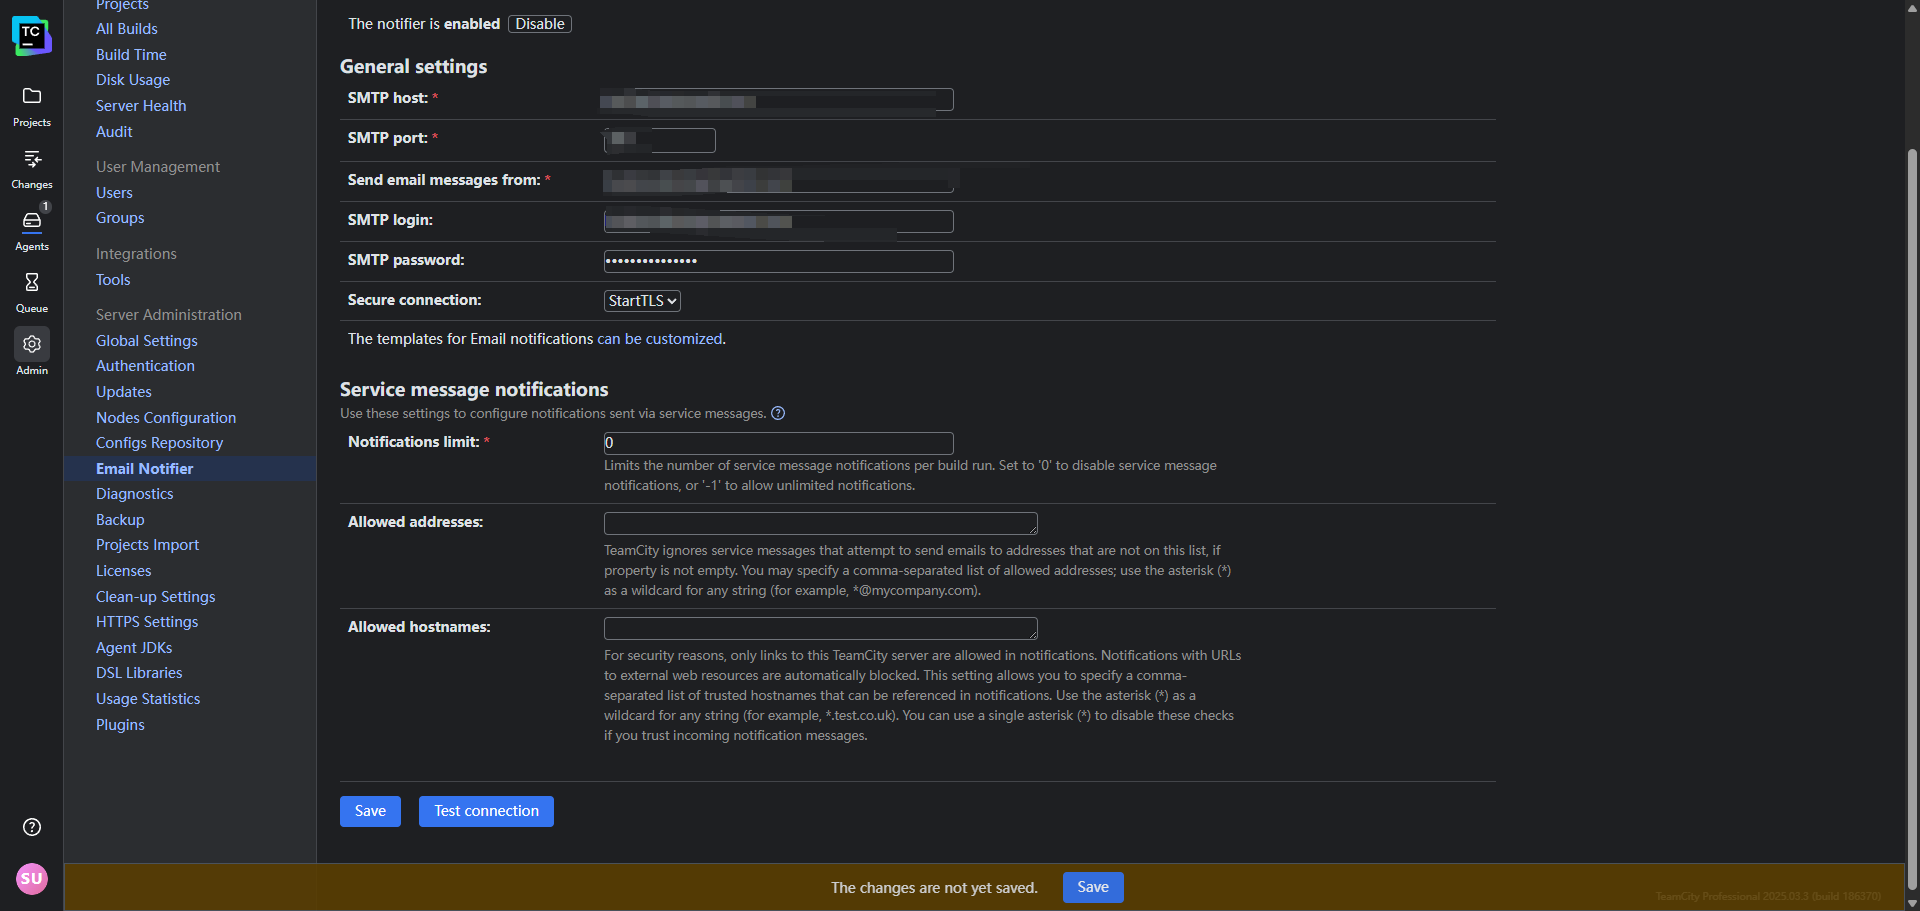
Last, just setup the Email Notifier, config the related fields with your email SMTP server and port, then click Test Connection to make sure everything is working. You should receive a test email shortly. Once everything is set up, you can start receiving notifications about your builds.
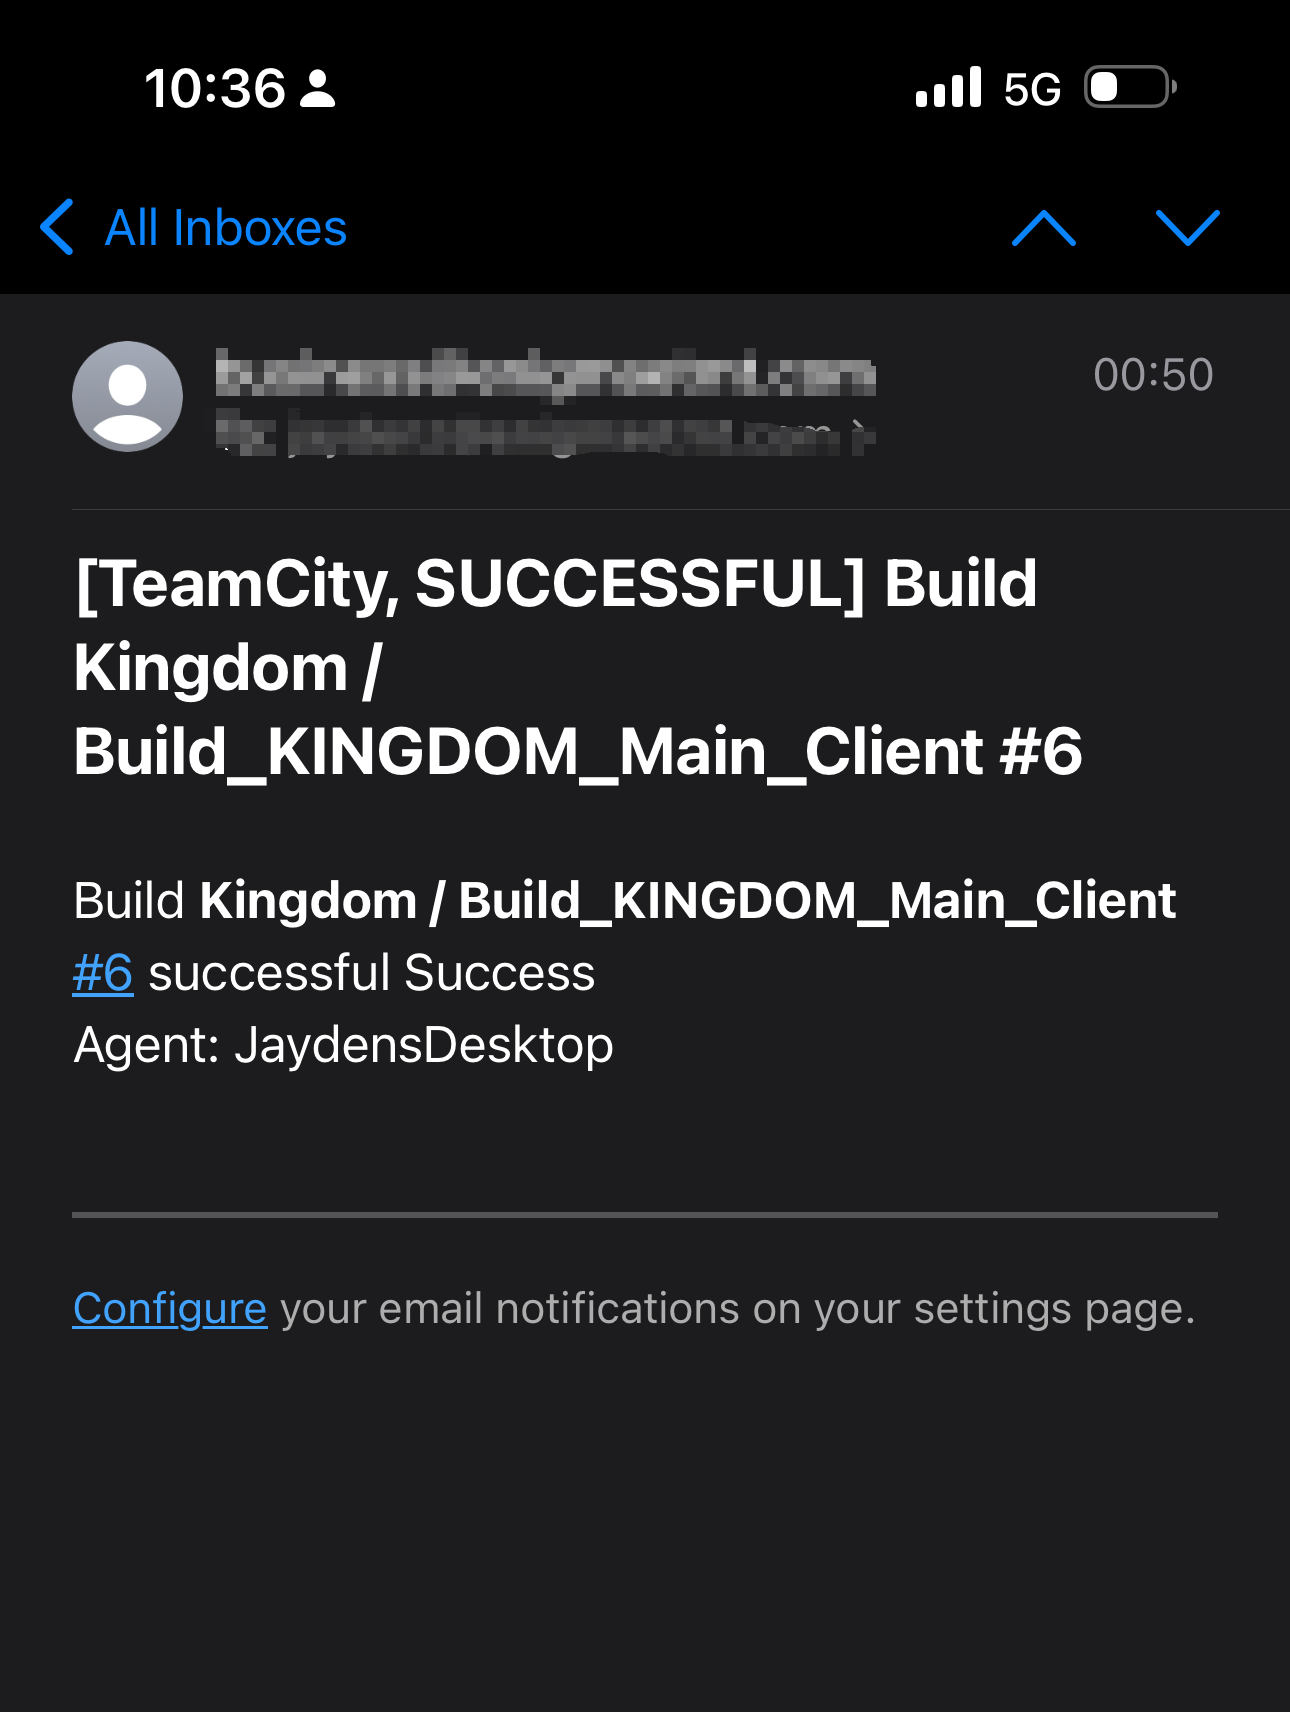
Result
It was pretty late when I finished this whole setup, so I forgot the test CL I submitted earlier and directly went to bed. The next morning, I woke up to a green build notification in my inbox, and I was like “Oh, right, I set up a CI/CD pipeline yesterday!” It was a great feeling to see that everything worked as expected.